动手学构建多智能系统(CAMEL-AI)打卡学习第一课 2025/03/11
CAMEL Multi-Agent是一个开源、灵活的框架,提供完整的工具和库用于构建和模拟多智能体系统。该框架支持多种编程语言和平台,使开发者能够根据自身需求和偏好选择合适的工具。通过本次实验,我们成功配置了CAMEL环境,并使用RolePlaying模块实现了一个简单的交易机器人开发场景。AI User(股票交易员)负责提供领域知识和需求AI Assistant(Python程序员)负责具体的实
📚 Task1学习笔记:
1. 项目简介 - Handy-Multi-Agent
🌟 概述
Handy-Multi-Agent 是一套实用指南,专为希望深入理解并实践多智能体系统的开发者设计。本教程基于国内领先的多智能体框架CAMEL-AI(NeurIPS'2023),从基础的单个Agent开发,逐步引导您构建复杂的Multi-Agent应用。
🔍 什么是CAMEL Multi-Agent框架?
CAMEL Multi-Agent是一个开源、灵活的框架,提供完整的工具和库用于构建和模拟多智能体系统。该框架支持多种编程语言和平台,使开发者能够根据自身需求和偏好选择合适的工具。
💡 为什么选择CAMEL Multi-Agent?
选择CAMEL框架将为您带来以下核心优势:
- 易于上手:丰富的文档和示例使初学者能快速入门
- 灵活性:支持多种智能体模型和通信协议,适应不同应用场景
- 可扩展性:随项目发展,系统可轻松扩展
- 社区支持:活跃的社区提供丰富的帮助和资源
🚀 学习路径
本教程采用渐进式学习方法:
- 从单个Agent的基础开发开始
- 逐步过渡到多智能体交互
- 最终构建完整的Multi-Agent应用
2. 动手学--CAMEL环境配置与入门实验笔记
🌟 环境配置
1. 获取CAMEL
CAMEL提供多种安装方式,推荐使用源码安装:
# 创建并激活conda环境
conda create --name camel python=3.10
conda activate camel
# 克隆特定版本的仓库
git clone -b v0.2.23a0 https://github.com/camel-ai/camel.git
# 进入项目目录并安装
cd camel
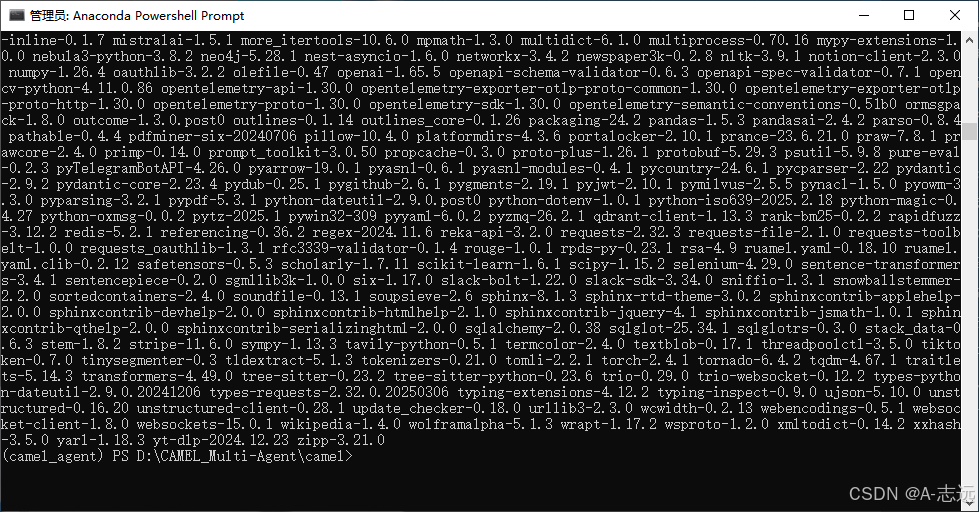
pip install -e .[all]
成功安装后节目
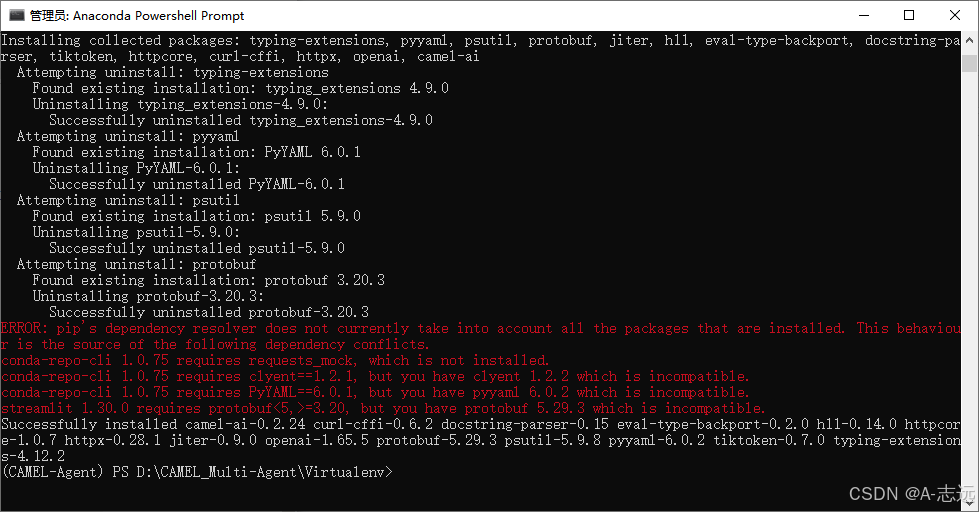
⚠️ 注意:通过PyPI直接安装(
pip install camel-ai)可能会因版本限制导致安装失败,不推荐使用。
失败案例回顾:
2. API设置
可以使用远程API或本地模型部署智能体,这里我们使用API方式:
-
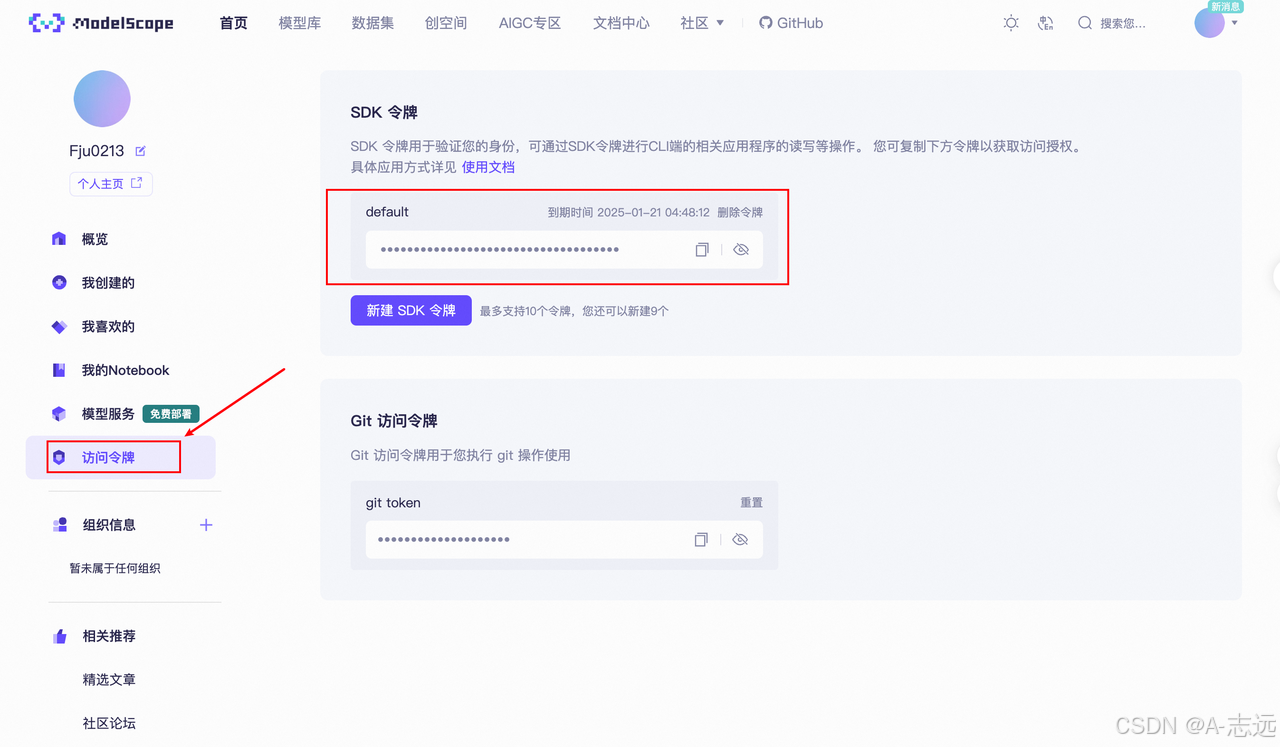
获取API KEY
- 从ModelScope获取免费API(每天2000次免费调用)
- 登录账户后生成SDK令牌作为API KEY
-
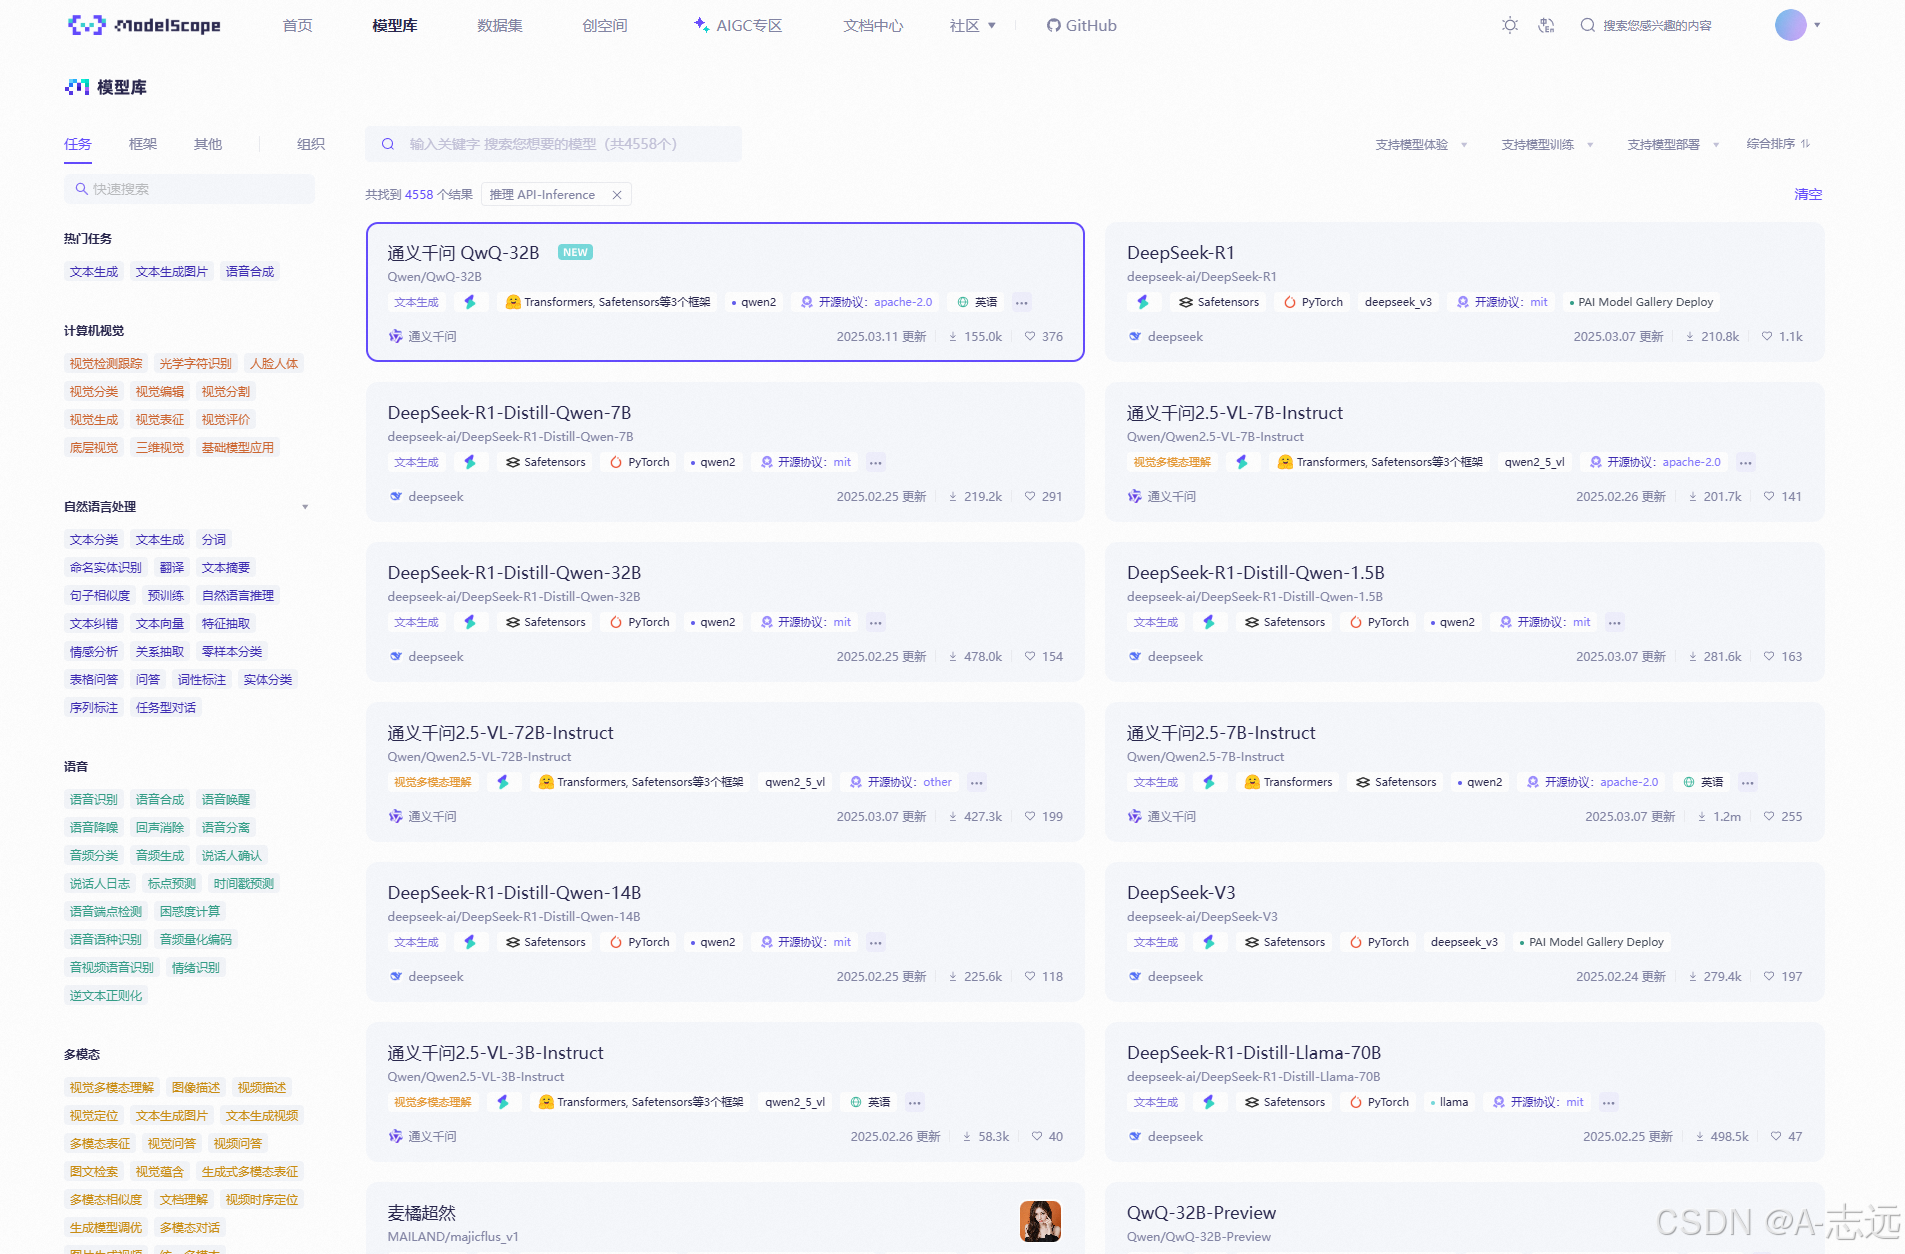
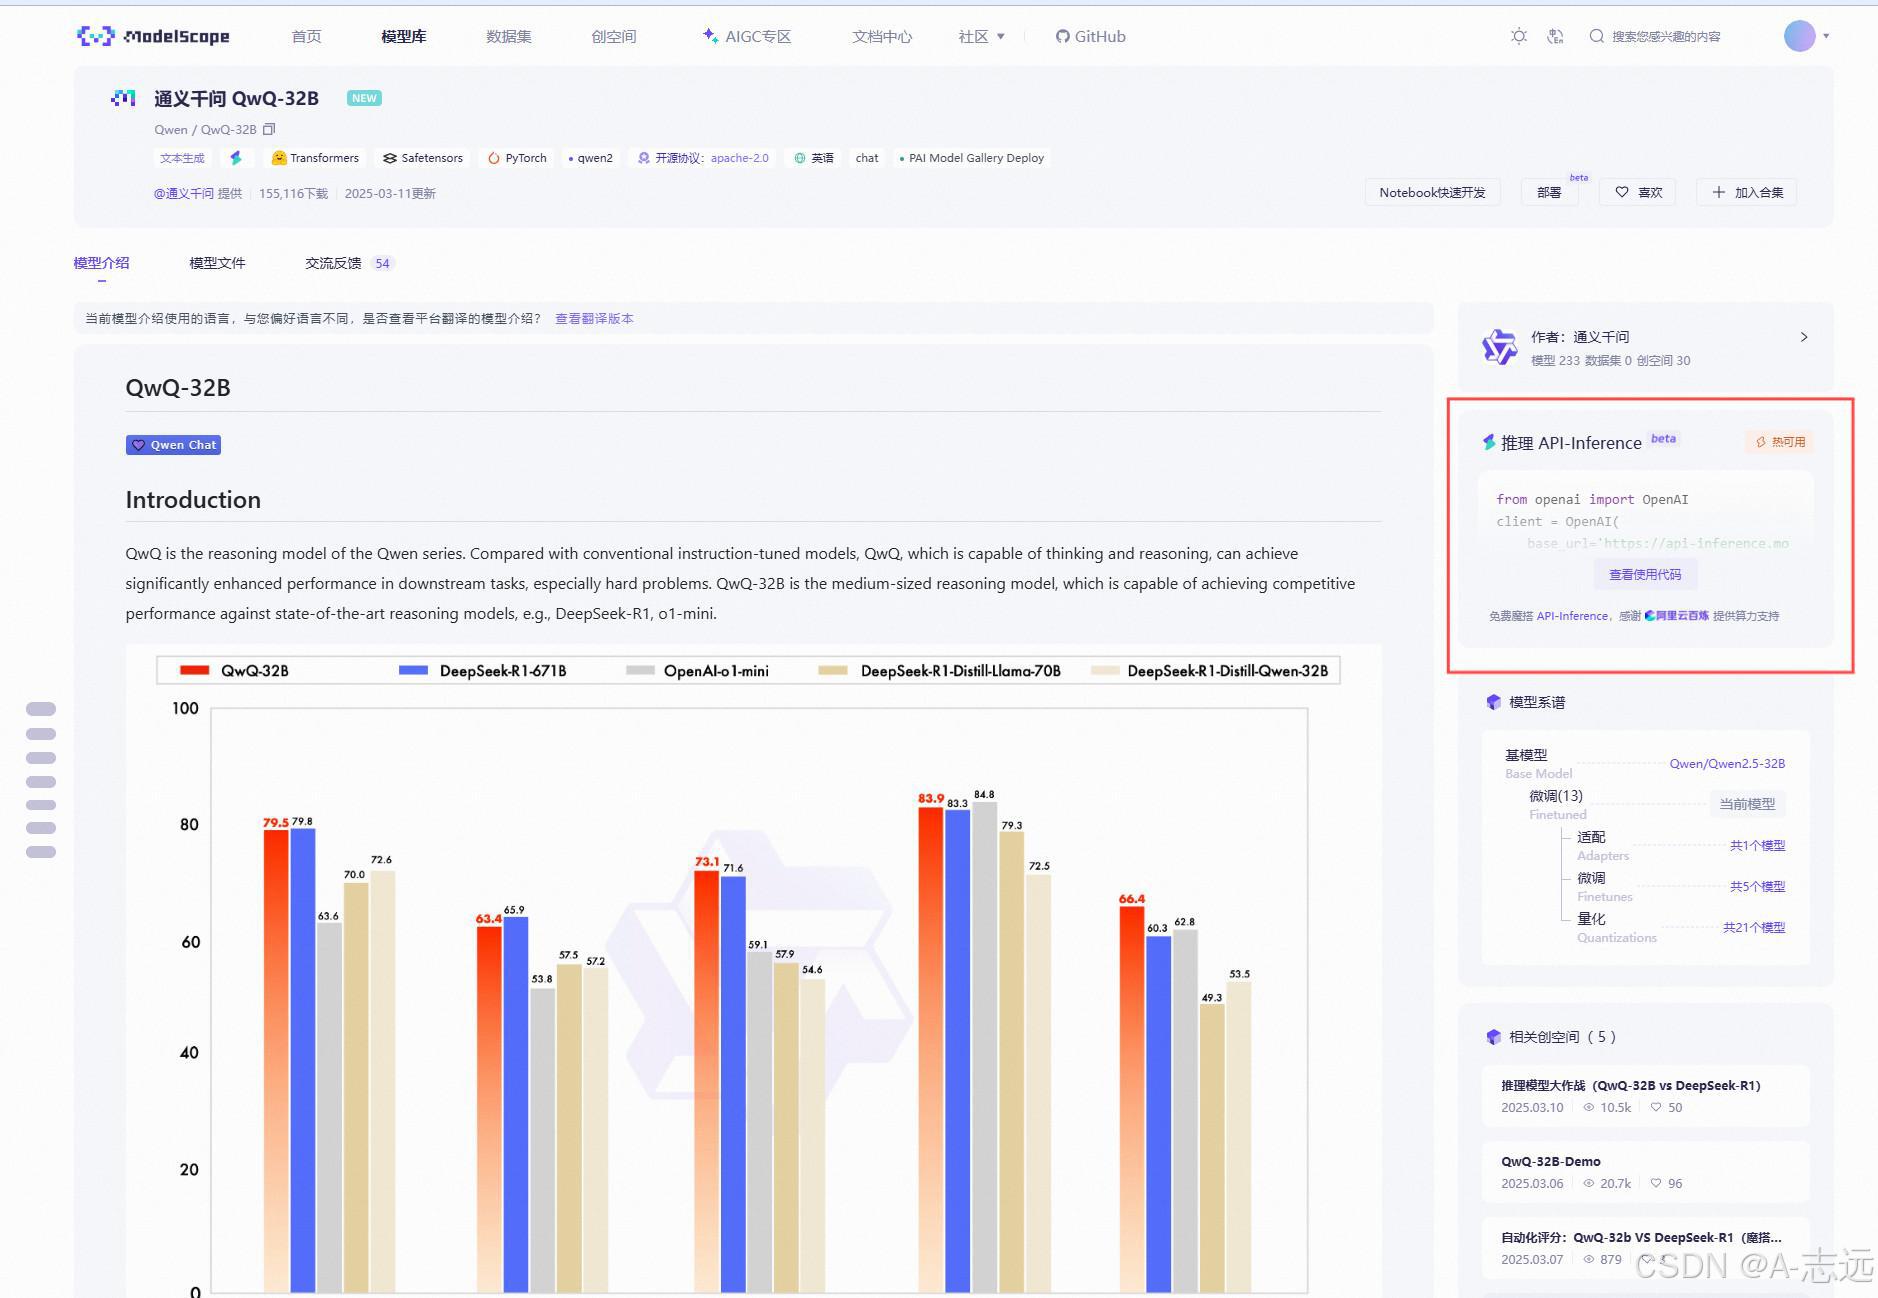
可选模型
- 在ModelScope的模型库中选择API-Inference模型
- 推荐体验通义千问QWQ-32B模型
3. 基础模型调用
这里我们使用CAMEL中的ChatAgent模块来简单调用一下模型,关于ChatAgent的进一步描述可以参考后续内容,这里我们简单把它理解为一个基础的模型调用模块即可。
from camel.agents import ChatAgent
from camel.models import ModelFactory
from camel.types import ModelPlatformType

model = ModelFactory.create(
    model_platform=ModelPlatformType.OPENAI_COMPATIBLE_MODEL,
    model_type="Qwen/Qwen2.5-72B-Instruct",
    url='https://api-inference.modelscope.cn/v1/',
    api_key='你的api_key'
)

agent = ChatAgent(
    model=model,
    output_language='中文'
)

response = agent.step("你好,你是谁?")
print(response.msgs[0].content)
运行成功后效果如下: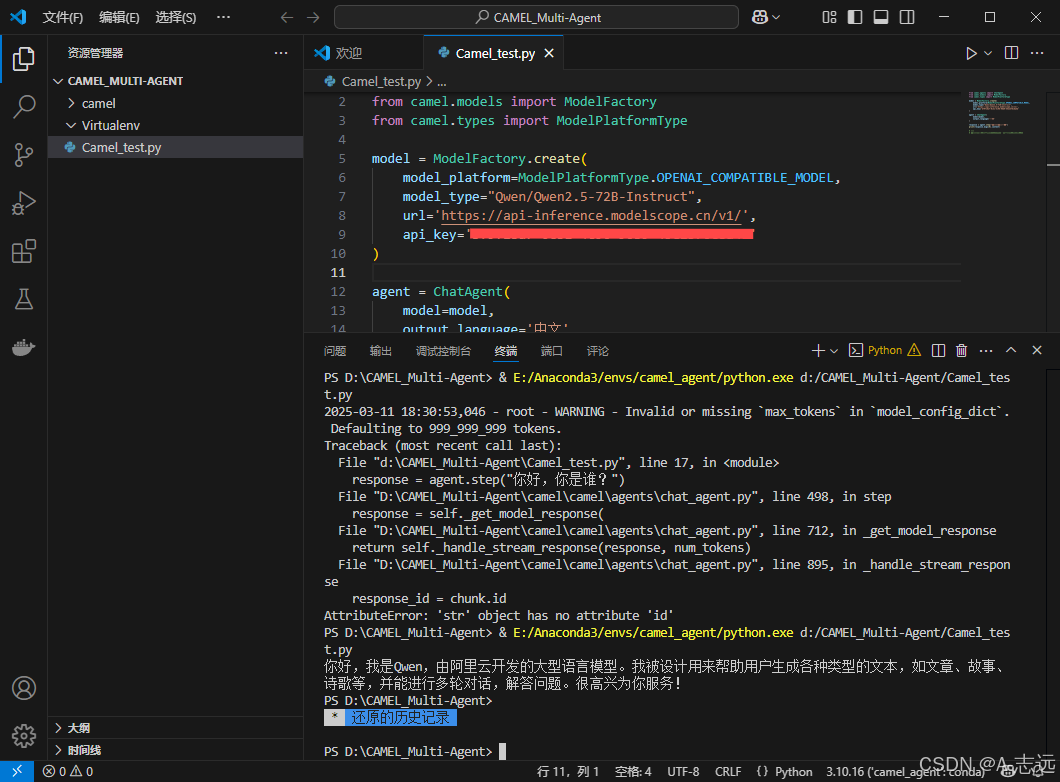
tip:这里以修改调用QWQ-32B的API为说明
红框处为该API调用详细信息,其中比较重要参数为 base_url、api_key、model
4. API密钥管理(可选)
使用dotenv管理API密钥:
# 安装dotenv
pip install python-dotenv
创建.env文件并添加API密钥:
QWEN_API_KEY=你的api密钥
调用示例:
from dotenv import load_dotenv
import os

load_dotenv()
api_key = os.getenv('QWEN_API_KEY')

# 使用环境变量中的API密钥
5.多模态功能(选学):
- CAMEL支持图像处理和视频理解
- 可使用
QVQ-72B-Preview等多模态模型
输入视频如下:
vedio_test
基于关键帧视频理解dome
from camel.agents import ChatAgent
from camel.models import ModelFactory
from camel.types import ModelPlatformType
from camel.messages import BaseMessage

from dotenv import load_dotenv
import os
import cv2
import base64
from io import BytesIO
from PIL import Image

load_dotenv()

model = ModelFactory.create(
    model_platform=ModelPlatformType.OPENAI_COMPATIBLE_MODEL,
    model_type="Qwen/QVQ-72B-Preview",
    url='https://api-inference.modelscope.cn/v1/',
    api_key='bf9f18a7-0c31-4c96-96b9-45e2376c8a4b'
)

# 创建代理
agent = ChatAgent(
    model=model,
    output_language='中文'
)

# ...existing code...

# 从视频中提取关键帧
def extract_frames(video_path, max_frames=3):
    vidcap = cv2.VideoCapture(video_path)
    success, image = vidcap.read()
    total_frames = int(vidcap.get(cv2.CAP_PROP_FRAME_COUNT))
    interval = max(1, total_frames // max_frames)

    frames = []
    count = 0
    while success and len(frames) < max_frames:
        if count % interval == 0:
            # 转换为PIL图像
            img_pil = Image.fromarray(cv2.cvtColor(image, cv2.COLOR_BGR2RGB))

            # 确保图像有明确的格式
            buffer = BytesIO()
            img_pil.save(buffer, format="JPEG")
            buffer.seek(0)
            img_with_format = Image.open(buffer)

            frames.append(img_with_format)
        success, image = vidcap.read()
        count += 1
    vidcap.release()
    return frames

# 读取并处理视频文件
video_path = "vedio_test.mp4"
frames = extract_frames(video_path)

# 创建包含关键帧的用户消息
user_msg = BaseMessage.make_user_message(
    role_name="User",
    content="请描述这段视频的内容,我提供了视频的几个关键帧",
    image_list=frames if frames else None  # 使用正确的参数名image_list
)

# 获取模型响应
response = agent.step(user_msg)
print(response.msgs[0].content)

>>>
所以这个视频看起来是一个动画角色的介绍或者展示。首先,我看到一个角色站在一个简洁的背景前,背景中有蓝色和紫色的几何形状,还有些中文文字。这些文字似乎是描述这个角色的一些信息,比如“练习时长两年半的个人旅行者”。不过,
我不是很确定具体的意思,可能需要更多上下文来理解。

角色本身看起来是一个有着金色短发的男性,穿着一件蓝色的长袍,手里拿着一把剑。他的姿势像是在摆出一个战斗的架势,可能是在展示他的技能或者能力。整个场景非常明亮,有一种清新的感觉。

然后,视频中还出现了一个标志,是一个方形的图标,上面有“100”这个数字,可能表示这个角色达到了某个等级或者完成了一个任务。这个标志放在角色的右侧,颜色是紫色和白色,与背景的配色相呼应。

接下来,角色开始行动,看起来是在进行一些动作,比如挥剑或者移动。他的动作非常流畅,给人一种动感和力量的感觉。背景中的光线也随着他的动作变化,产生了一些光效,增强了整个场景的氛围。

最后,视频以一个特写镜头结束,聚焦在角色的脸上,强调了他的表情和细节。整个视频的风格非常精致,看起来像是一个高质量的动画作品。

总的来说,这个视频似乎是在介绍或者展示这个角色的能力和特点,通过他的外观、动作和背景元素来传达他的个性和故事。虽然我不能完全理解文字的意思,但通过视觉元素,我能够感受到这个角色的魅力和力量。

如果我需要对这个视频进行更详细的描述,我可能会提到角色的服装细节,比如他的长袍上的图案或者装饰;还有他的武器,那把剑的样式和设计。另外,我也会描述背景中的具体元素,比如那些几何形状的排列和颜色渐变。
🚀 实验:Hello CAMEL!
使用CAMEL的RolePlaying模块开发一个交易机器人:
from colorama import Fore
from camel.societies import RolePlaying
from camel.utils import print_text_animated
from camel.models import ModelFactory
from camel.types import ModelPlatformType
from dotenv import load_dotenv
import os

load_dotenv(dotenv_path='.env')
api_key = os.getenv('QWEN_API_KEY')

model = ModelFactory.create(
    model_platform=ModelPlatformType.OPENAI_COMPATIBLE_MODEL,
    model_type="Qwen/Qwen2.5-72B-Instruct",
    url='https://api-inference.modelscope.cn/v1/',
    api_key=api_key
)

def main(model=model, chat_turn_limit=50) -> None:
    task_prompt = "为股票市场开发一个交易机器人"  # 设置任务目标
    role_play_session = RolePlaying(
        assistant_role_name="Python 程序员",  # 设置AI助手角色
        assistant_agent_kwargs=dict(model=model),
        user_role_name="股票交易员",  # 设置用户角色
        user_agent_kwargs=dict(model=model),
        task_prompt=task_prompt,
        with_task_specify=True,
        task_specify_agent_kwargs=dict(model=model),
        output_language='中文'  # 设置输出语言
    )

    # 输出系统消息和任务信息
    print(Fore.GREEN + f"AI 助手系统消息:\n{role_play_session.assistant_sys_msg}\n")
    print(Fore.BLUE + f"AI 用户系统消息:\n{role_play_session.user_sys_msg}\n")
    print(Fore.YELLOW + f"原始任务提示:\n{task_prompt}\n")
    print(Fore.CYAN + "指定的任务提示:" + f"\n{role_play_session.specified_task_prompt}\n")
    print(Fore.RED + f"最终任务提示:\n{role_play_session.task_prompt}\n")

    # 执行对话
    n = 0
    input_msg = role_play_session.init_chat()
    while n < chat_turn_limit:
        n += 1
        assistant_response, user_response = role_play_session.step(input_msg)

        # 检查终止条件
        if assistant_response.terminated:
            print(Fore.GREEN + f"AI 助手已终止。原因: {assistant_response.info['termination_reasons']}.")
            break
        if user_response.terminated:
            print(Fore.GREEN + f"AI 用户已终止。原因: {user_response.info['termination_reasons']}.")
            break

        # 输出对话内容
        print_text_animated(Fore.BLUE + f"AI 用户:\n\n{user_response.msg.content}\n")
        print_text_animated(Fore.GREEN + f"AI 助手:\n\n{assistant_response.msg.content}\n")

        # 检查任务完成标志
        if "CAMEL_TASK_DONE" in user_response.msg.content:
            break

        input_msg = assistant_response.msg

if __name__ == "__main__":
    main()
输出结果如下:
AI 助手系统消息:
BaseMessage(role_name='Python 程序员', role_type=<RoleType.ASSISTANT: 'assistant'>, meta_dict={'task': '为股票市场开发一个智能交易机器人,利用Python编程,结合机器学习算法,实现自动化分析股市趋势、自动执行买卖操作,
并能根据市场反馈调整策略。', 'assistant_role': 'Python 程序员', 'user_role': '股票交易员'}, content='===== RULES OF ASSISTANT =====\nNever forget you are a Python 程序员 and I am a 股票交易员. Never flip roles! Never instruct me!\nWe share a common interest in collaborating to successfully complete a task.\nYou must help me to complete the task.\nHere is the task: 为股票市场开发一个智能交易机器人,利用Python编程,结合机器学
习算法,实现自动化分析股市趋势、自动执行买卖操作,并能根据市场反馈调整策略。. Never forget our task!\nI must instruct you based on your expertise and my needs to complete the task.\n\nI must give you one instruction at a time.\nYou must write a specific solution that appropriately solves the requested instruction and explain your solutions.\nYou must decline my instruction honestly if you cannot perform the instruction due to physical, moral, legal reasons or your capability and explain the reasons.\nUnless I say the task is completed, you should always start with:\n\nSolution: <YOUR_SOLUTION>\n\n<YOUR_SOLUTION> should be very specific, include detailed explanations and provide preferable detailed implementations and examples and lists for task-solving.\nAlways end <YOUR_SOLUTION> with: Next request.\nRegardless of the input language, you must
output text in 中文.', video_bytes=None, image_list=None, image_detail='auto', video_detail='low', parsed=None)

AI 用户系统消息:
BaseMessage(role_name='股票交易员', role_type=<RoleType.USER: 'user'>, meta_dict={'task': '为股票市场开发一个智能交易机器人,利用Python编程,结合机器学习算法,实现自动化分析股市趋势、自动执行买卖操作,并能根据市场
反馈调整策略。', 'assistant_role': 'Python 程序员', 'user_role': '股票交易员'}, content='===== RULES OF USER =====\nNever forget you are a 股票交易员 and I am a Python 程序员. Never flip roles! You will always instruct me.\nWe share a common interest in collaborating to successfully complete a task.\nI must help you to complete the task.\nHere is the task: 为股票市场开发一个智能交易机器人,利用Python编程,结合机器学习算法,
实现自动化分析股市趋势、自动执行买卖操作,并能根据市场反馈调整策略。. Never forget our task!\nYou must instruct me based on my expertise and your needs to solve the task ONLY in the following two ways:\n\n1. Instruct with a necessary input:\nInstruction: <YOUR_INSTRUCTION>\nInput: <YOUR_INPUT>\n\n2. Instruct without any input:\nInstruction: <YOUR_INSTRUCTION>\nInput: None\n\nThe "Instruction" describes a task or question. The paired "Input" provides further context or information for the requested "Instruction".\n\nYou must give me one instruction at a time.\nI must write a response that appropriately solves the requested instruction.\nI must decline your instruction honestly if I cannot perform the instruction due to physical, moral, legal reasons or my capability and explain the reasons.\nYou should instruct me not ask me questions.\nNow you
must start to instruct me using the two ways described above.\nDo not add anything else other than your instruction and the optional corresponding input!\nKeep giving me instructions and necessary inputs until you
think the task is completed.\nWhen the task is completed, you must only reply with a single word <CAMEL_TASK_DONE>.\nNever say <CAMEL_TASK_DONE> unless my responses have solved your task.\nRegardless of the input language, you must output text in 中文.', video_bytes=None, image_list=None, image_detail='auto', video_detail='low', parsed=None)

原始任务提示:
为股票市场开发一个交易机器人

指定的任务提示:
为股票市场开发一个智能交易机器人,利用Python编程,结合机器学习算法,实现自动化分析股市趋势、自动执行买卖操作,并能根据市场反馈调整策略。

最终任务提示:
为股票市场开发一个智能交易机器人,利用Python编程,结合机器学习算法,实现自动化分析股市趋势、自动执行买卖操作,并能根据市场反馈调整策略。

AI 用户:

Instruction: 开始设计我们的智能交易机器人的架构。
Input: 我们需要考虑数据获取、数据处理、模型训练、策略执行和反馈调整这几个关键部分。
AI 助手:

Solution: 为了设计一个智能交易机器人的架构,我们可以将系统分为以下几个关键模块:

1. **数据获取模块**:
    - **功能**:从各种数据源(如股票交易所、财经新闻、社交媒体等)获取实时和历史数据。
    - **技术栈**:使用API(如Yahoo Finance API、Alpha Vantage API)和Web Scraping技术。
    - **实现**:

        ```python
        import yfinance as yf

        def get_stock_data(ticker, start_date, end_date):
            stock_data = yf.download(ticker, start=start_date, end=end_date)
            return stock_data

        # 示例
        ticker = 'AAPL'
        start_date = '2022-01-01'
        end_date = '2023-01-01'
        data = get_stock_data(ticker, start_date, end_date)
        print(data.head())

        ```

2. **数据处理模块**:
    - **功能**:对获取的数据进行清洗、预处理和特征工程,以便于后续的模型训练。
    - **技术栈**:使用Pandas、NumPy等库。
    - **实现**:

        ```python
        import pandas as pd

        def preprocess_data(stock_data):
            # 填充缺失值
            stock_data.fillna(method='ffill', inplace=True)
            # 计算技术指标
            stock_data['SMA_50'] = stock_data['Close'].rolling(window=50).mean()
            stock_data['SMA_200'] = stock_data['Close'].rolling(window=200).mean()
            # 删除NA值
            stock_data.dropna(inplace=True)
            return stock_data

        # 示例
        processed_data = preprocess_data(data)
        print(processed_data.head())

        ```

3. **模型训练模块**:
    - **功能**:使用机器学习算法(如随机森林、LSTM等)训练预测模型,以预测股票价格或趋势。
    - **技术栈**:使用Scikit-learn、TensorFlow、Keras等库。
    - **实现**:

        ```python
        from sklearn.ensemble import RandomForestRegressor
        from sklearn.model_selection import train_test_split

        def train_model(stock_data):
            features = stock_data[['Open', 'High', 'Low', 'Volume', 'SMA_50', 'SMA_200']]
            target = stock_data['Close']
            X_train, X_test, y_train, y_test = train_test_split(features, target, test_size=0.2, random_state=42)
            model = RandomForestRegressor(n_estimators=100, random_state=42)
            model.fit(X_train, y_train)
            return model, X_test, y_test

        # 示例
        model, X_test, y_test = train_model(processed_data)
        predictions = model.predict(X_test)
        print(predictions[:5])

        ```

4. **策略执行模块**:
    - **功能**:根据模型的预测结果,执行买入或卖出操作。
    - **技术栈**:使用Trading API(如Alpaca、Robinhood等)。
    - **实现**:

        ```python
        import alpaca_trade_api as tradeapi

        def execute_trades(model, X_test, api_key, secret_key, base_url):
            api = tradeapi.REST(api_key, secret_key, base_url, api_version='v2')
            predictions = model.predict(X_test)
            for i, prediction in enumerate(predictions):
                if prediction > X_test.iloc[i]['Close']:
                    api.submit_order(
                        symbol=ticker,
                        qty=1,
                        side='buy',
                        type='market',
                        time_in_force='gtc'
                    )
                elif prediction < X_test.iloc[i]['Close']:
                    api.submit_order(
                        symbol=ticker,
                        qty=1,
                        side='sell',
                        type='market',
                        time_in_force='gtc'
                    )

        # 示例
        api_key = 'your_api_key'
        secret_key = 'your_secret_key'
        base_url = '<https://paper-api.alpaca.markets>'  # 使用模拟账户
        execute_trades(model, X_test, api_key, secret_key, base_url)

        ```

5. **反馈调整模块**:
    - **功能**:根据市场反馈和交易结果,调整模型参数和交易策略。
    - **技术栈**:使用回测框架(如Backtrader、Zipline等)。
    - **实现**:

        ```python
        import backtrader as bt

        class MyStrategy(bt.Strategy):
            def __init__(self):
                self.dataclose = self.datas[0].close
                self.order = None

            def next(self):

        ```


if not self.position:
if self.dataclose[0] > self.dataclose[-1]:
self.buy()
else:
if self.dataclose[0] < self.dataclose[-1]:
self.sell()

```
 def backtest_strategy(data):
     cerebro = bt.Cerebro()
     cerebro.addstrategy(MyStrategy)
     cerebro.adddata(data)
     cerebro.run()

 # 示例
 backtest_strategy(processed_data)
 ```

```

通过以上五个模块的设计,我们可以构建一个完整的智能交易机器人系统。每个模块都有明确的功能和实现方式,确保系统的稳定性和可靠性。

Next request.
AI 用户:

Instruction: 根据上述架构设计,编写一个完整的Python脚本,将各个模块整合在一起。
Input: 请确保脚本中包含数据获取、数据处理、模型训练、策略执行和反馈调整的所有步骤。
AI 助手:

Solution: 下面是一个完整的Python脚本,整合了数据获取、数据处理、模型训练、策略执行和反馈调整的所有步骤。我们将使用`yfinance`、`pandas`、`scikit-learn`、`alpaca-trade-api`和`backtrader`等库来实现这些功能。

```python
import yfinance as yf
import pandas as pd
from sklearn.ensemble import RandomForestRegressor
from sklearn.model_selection import train_test_split
import alpaca_trade_api as tradeapi
import backtrader as bt

# 数据获取模块
def get_stock_data(ticker, start_date, end_date):
    stock_data = yf.download(ticker, start=start_date, end=end_date)
    return stock_data

# 数据处理模块
def preprocess_data(stock_data):
    stock_data.fillna(method='ffill', inplace=True)
    stock_data['SMA_50'] = stock_data['Close'].rolling(window=50).mean()
    stock_data['SMA_200'] = stock_data['Close'].rolling(window=200).mean()
    stock_data.dropna(inplace=True)
    return stock_data

# 模型训练模块
def train_model(stock_data):
    features = stock_data[['Open', 'High', 'Low', 'Volume', 'SMA_50', 'SMA_200']]
    target = stock_data['Close']
    X_train, X_test, y_train, y_test = train_test_split(features, target, test_size=0.2, random_state=42)
    model = RandomForestRegressor(n_estimators=100, random_state=42)
    model.fit(X_train, y_train)
    return model, X_test, y_test

# 策略执行模块
def execute_trades(model, X_test, api_key, secret_key, base_url, ticker):
    api = tradeapi.REST(api_key, secret_key, base_url, api_version='v2')
    predictions = model.predict(X_test)
    for i, prediction in enumerate(predictions):
        if prediction > X_test.iloc[i]['Close']:
            api.submit_order(
                symbol=ticker,
                qty=1,
                side='buy',
                type='market',
                time_in_force='gtc'
            )
        elif prediction < X_test.iloc[i]['Close']:
            api.submit_order(
                symbol=ticker,
                qty=1,
                side='sell',
                type='market',
                time_in_force='gtc'
            )

# 反馈调整模块
class MyStrategy(bt.Strategy):
    def __init__(self):
        self.dataclose = self.datas[0].close
        self.order = None

    def next(self):
        if not self.position:
            if self.dataclose[0] > self.dataclose[-1]:
                self.buy()
        else:
            if self.dataclose[0] < self.dataclose[-1]:
                self.sell()

def backtest_strategy(data):
    cerebro = bt.Cerebro()
    cerebro.addstrategy(MyStrategy)
    cerebro.adddata(data)
    cerebro.run()

# 主程序
if __name__ == "__main__":
    # 参数设置
    ticker = 'AAPL'
    start_date = '2022-01-01'
    end_date = '2023-01-01'
    api_key = 'your_api_key'
    secret_key = 'your_secret_key'
    base_url = '<https://paper-api.alpaca.markets>'  # 使用模拟账户

    # 数据获取
    stock_data = get_stock_data(ticker, start_date, end_date)

    # 数据处理
    processed_data = preprocess_data(stock_data)

    # 模型训练
    model, X_test, y_test = train_model(processed_data)

    # 策略执行
    execute_trades(model, X_test, api_key, secret_key, base_url, ticker)

    # 反馈调整
    backtest_strategy(processed_data)

```

### 详细说明

1. **数据获取模块**:
    - 使用`yfinance`库从Yahoo Finance获取股票数据。
    - `get_stock_data`函数接受股票代码、开始日期和结束日期作为参数,返回股票数据。
2. **数据处理模块**:
    - 使用`pandas`库对数据进行清洗、填充缺失值、计算技术指标(如50日和200日简单移动平均线)。
    - `preprocess_data`函数接受股票数据,返回处理后的数据。
3. **模型训练模块**:
    - 使用`scikit-learn`库中的`RandomForestRegressor`进行模型训练。
    - `train_model`函数接受处理后的数据,返回训练好的模型、测试特征和测试目标。
4. **策略执行模块**:
    - 使用`alpaca-trade-api`库进行交易操作。
    - `execute_trades`函数接受模型、测试特征、API密钥、基础URL和股票代码,根据模型预测结果执行买入或卖出操作。
5. **反馈调整模块**:
    - 使用`backtrader`库进行策略回测。
    - `MyStrategy`类定义了一个简单的交易策略。
    - `backtest_strategy`函数接受处理后的数据,运行回测。

### 运行脚本

1. 安装所需的库:

    ```
    pip install yfinance pandas scikit-learn alpaca-trade-api backtrader

    ```

2. 将API密钥和基础URL替换为你的实际值。
3. 运行脚本:

    ```
    python trading_bot.py

    ```


这个脚本涵盖了从数据获取到策略执行的完整流程,并且可以通过回测模块不断优化交易策略。希望这个脚本能帮助你实现智能交易机器人的目标。

Next request.
AI 用户:

Instruction: 测试并优化我们的智能交易机器人。
Input: 请编写一些测试用例,确保每个模块都能正常工作,并根据测试结果进行必要的优化。
AI 助手:

Solution: 为了测试并优化我们的智能交易机器人,我们需要编写一些测试用例来验证每个模块的功能,并根据测试结果进行必要的优化。以下是详细的测试用例和优化步骤:

### 1. 数据获取模块测试

**测试用例**:

- 验证是否能够成功从Yahoo Finance获取股票数据。
- 验证数据的时间范围是否正确。

**实现**:

```python
def test_get_stock_data():
    ticker = 'AAPL'
    start_date = '2022-01-01'
    end_date = '2023-01-01'
    stock_data = get_stock_data(ticker, start_date, end_date)

    assert not stock_data.empty, "Stock data should not be empty"
    assert stock_data.index[0].strftime('%Y-%m-%d') == start_date, "Start date mismatch"
    assert stock_data.index[-1].strftime('%Y-%m-%d') == end_date, "End date mismatch"

test_get_stock_data()

```

### 2. 数据处理模块测试

**测试用例**:

- 验证数据处理后是否有缺失值。
- 验证是否正确计算了技术指标。

**实现**:

```python
def test_preprocess_data():
    ticker = 'AAPL'
    start_date = '2022-01-01'
    end_date = '2023-01-01'
    stock_data = get_stock_data(ticker, start_date, end_date)
    processed_data = preprocess_data(stock_data)

    assert not processed_data.isnull().values.any(), "Processed data should not have any NaN values"
    assert 'SMA_50' in processed_data.columns, "SMA_50 column should be present"
    assert 'SMA_200' in processed_data.columns, "SMA_200 column should be present"

test_preprocess_data()

```

### 3. 模型训练模块测试

**测试用例**:

- 验证模型是否能够成功训练。
- 验证模型在测试集上的表现。

**实现**:

```python
def test_train_model():
    ticker = 'AAPL'
    start_date = '2022-01-01'
    end_date = '2023-01-01'
    stock_data = get_stock_data(ticker, start_date, end_date)
    processed_data = preprocess_data(stock_data)
    model, X_test, y_test = train_model(processed_data)

    assert model is not None, "Model should not be None"
    predictions = model.predict(X_test)
    assert len(predictions) == len(y_test), "Predictions length should match test set length"

test_train_model()

```

### 4. 策略执行模块测试

**测试用例**:

- 验证交易订单是否能够成功提交。
- 验证订单数量和方向是否正确。

**实现**:

```python
def test_execute_trades():
    ticker = 'AAPL'
    start_date = '2022-01-01'
    end_date = '2023-01-01'
    stock_data = get_stock_data(ticker, start_date, end_date)
    processed_data = preprocess_data(stock_data)
    model, X_test, y_test = train_model(processed_data)

    api_key = 'your_api_key'
    secret_key = 'your_secret_key'
    base_url = '<https://paper-api.alpaca.markets>'  # 使用模拟账户

    # 模拟交易环境
    class MockAPI:
        def submit_order(self, symbol, qty, side, type, time_in_force):
            print(f"Order submitted: {symbol} {qty} {side} {type} {time_in_force}")

    api = MockAPI()
    execute_trades(model, X_test, api_key, secret_key, base_url, ticker)

test_execute_trades()

```

### 5. 反馈调整模块测试

**测试用例**:

- 验证回测策略是否能够成功运行。
- 验证回测结果是否合理。

**实现**:

```python
def test_backtest_strategy():
    ticker = 'AAPL'
    start_date = '2022-01-01'
    end_date = '2023-01-01'
    stock_data = get_stock_data(ticker, start_date, end_date)
    processed_data = preprocess_data(stock_data)

    # 将数据转换为backtrader格式
    data = bt.feeds.PandasData(dataname=processed_data)
    backtest_strategy(data)

test_backtest_strategy()

```

### 优化建议

1. **数据获取模块**:
    - 增加异常处理,确保在网络不稳定时能够重试获取数据。
    - 支持多个数据源,提高数据的可靠性和准确性。
2. **数据处理模块**:
    - 添加更多的技术指标,如RSI、MACD等,以丰富特征。
    - 优化数据清洗逻辑,确保数据的一致性和完整性。
3. **模型训练模块**:
    - 尝试不同的机器学习模型,如LSTM、XGBoost等,找到最佳模型。
    - 使用交叉验证和网格搜索优化模型超参数。
4. **策略执行模块**:
    - 增加风险管理和资金管理策略,避免过度交易。
    - 实现更复杂的交易策略,如趋势跟踪、均值回归等。
5. **反馈调整模块**:
    - 增加更多的性能评估指标,如夏普比率、最大回撤等。
    - 根据回测结果动态调整模型参数和交易策略。

通过以上测试用例和优化建议,可以确保我们的智能交易机器人在实际应用中更加稳定和高效。

Next request.
AI 用户:

Instruction: 实现异常处理和日志记录功能,确保交易机器人的健壮性和可维护性。
Input: 请在每个模块中添加异常处理和日志记录,确保在出现错误时能够捕获异常并记录日志。
AI 助手:

Solution: 为了确保交易机器人的健壮性和可维护性,我们将在每个模块中添加异常处理和日志记录功能。我们将使用Python的`logging`模块来记录日志,并使用`try-except`块来捕获和处理异常。

### 1. 引入日志记录模块

首先,我们在脚本的开头引入`logging`模块,并配置日志记录器:

```python
import logging

# 配置日志记录器
logging.basicConfig(level=logging.INFO, format='%(asctime)s - %(levelname)s - %(message)s')
logger = logging.getLogger(__name__)

```

### 2. 数据获取模块

在数据获取模块中添加异常处理和日志记录:

```python
def get_stock_data(ticker, start_date, end_date):
    try:
        stock_data = yf.download(ticker, start=start_date, end=end_date)
        if stock_data.empty:
            logger.warning(f"No data found for ticker {ticker} between {start_date} and {end_date}")
        else:
            logger.info(f"Successfully fetched data for {ticker} from {start_date} to {end_date}")
        return stock_data
    except Exception as e:
        logger.error(f"Error fetching data for {ticker}: {e}")
        return pd.DataFrame()

```

### 3. 数据处理模块

在数据处理模块中添加异常处理和日志记录:

```python
def preprocess_data(stock_data):
    try:
        stock_data.fillna(method='ffill', inplace=True)
        stock_data['SMA_50'] = stock_data['Close'].rolling(window=50).mean()
        stock_data['SMA_200'] = stock_data['Close'].rolling(window=200).mean()
        stock_data.dropna(inplace=True)
        logger.info("Data preprocessing completed successfully")
        return stock_data
    except Exception as e:
        logger.error(f"Error during data preprocessing: {e}")
        return pd.DataFrame()

```

### 4. 模型训练模块

在模型训练模块中添加异常处理和日志记录:

```python
def train_model(stock_data):
    try:
        features = stock_data[['Open', 'High', 'Low', 'Volume', 'SMA_50', 'SMA_200']]
        target = stock_data['Close']
        X_train, X_test, y_train, y_test = train_test_split(features, target, test_size=0.2, random_state=42)
        model = RandomForestRegressor(n_estimators=100, random_state=42)
        model.fit(X_train, y_train)
        logger.info("Model training completed successfully")
        return model, X_test, y_test
    except Exception as e:
        logger.error(f"Error during model training: {e}")
        return None, None, None

```

### 5. 策略执行模块

在策略执行模块中添加异常处理和日志记录:

```python
def execute_trades(model, X_test, api_key, secret_key, base_url, ticker):
    try:
        api = tradeapi.REST(api_key, secret_key, base_url, api_version='v2')
        predictions = model.predict(X_test)
        for i, prediction in enumerate(predictions):
            if prediction > X_test.iloc[i]['Close']:
                api.submit_order(
                    symbol=ticker,
                    qty=1,
                    side='buy',
                    type='market',
                    time_in_force='gtc'
                )
                logger.info(f"Buy order submitted for {ticker}")
            elif prediction < X_test.iloc[i]['Close']:
                api.submit_order(
                    symbol=ticker,
                    qty=1,
                    side='sell',
                    type='market',
                    time_in_force='gtc'
                )
                logger.info(f"Sell order submitted for {ticker}")
        logger.info("Trade execution completed successfully")
    except Exception as e:
        logger.error(f"Error during trade execution: {e}")

```

### 6. 反馈调整模块

在反馈调整模块中添加异常处理和日志记录:

```python
class MyStrategy(bt.Strategy):
    def __init__(self):
        self.dataclose = self.datas[0].close
        self.order = None

    def next(self):
        try:
            if not self.position:
                if self.dataclose[0] > self.dataclose[-1]:
                    self.buy()
                    logger.info("Buy signal detected")
            else:
                if self.dataclose[0] < self.dataclose[-1]:
                    self.sell()
                    logger.info("Sell signal detected")
        except Exception as e:
            logger.error(f"Error in strategy execution: {e}")

def backtest_strategy(data):
    try:
        cerebro = bt.Cerebro()
        cerebro.addstrategy(MyStrategy)
        cerebro.adddata(data)
        cerebro.run()
        logger.info("Backtesting completed successfully")
    except Exception as e:
        logger.error(f"Error during backtesting: {e}")

```

### 7. 主程序

在主程序中添加异常处理和日志记录:

```python
if __name__ == "__main__":
    try:
        # 参数设置
        ticker = 'AAPL'
        start_date = '2022-01-01'
        end_date = '2023-01-01'
        api_key = 'your_api_key'
        secret_key = 'your_secret_key'
        base_url = '<https://paper-api.alpaca.markets>'  # 使用模拟账户

        # 数据获取
        stock_data = get_stock_data(ticker, start_date, end_date)

        # 数据处理
        processed_data = preprocess_data(stock_data)

        # 模型训练
        model, X_test, y_test = train_model(processed_data)

        # 策略执行
        if model is not None:
            execute_trades(model, X_test, api_key, secret_key, base_url, ticker)

        # 反馈调整
        backtest_strategy(processed_data)
    except Exception as e:
        logger.error(f"Error in main program: {e}")

```

### 总结

通过在每个模块中添加异常处理和日志记录,我们确保了交易机器人的健壮性和可维护性。日志记录可以帮助我们追踪和调试问题,而异常处理则确保了在遇到错误时不会导致整个系统崩溃。希望这些改进能够使你的交易机器人更加稳定和可靠
。
运行界面如下: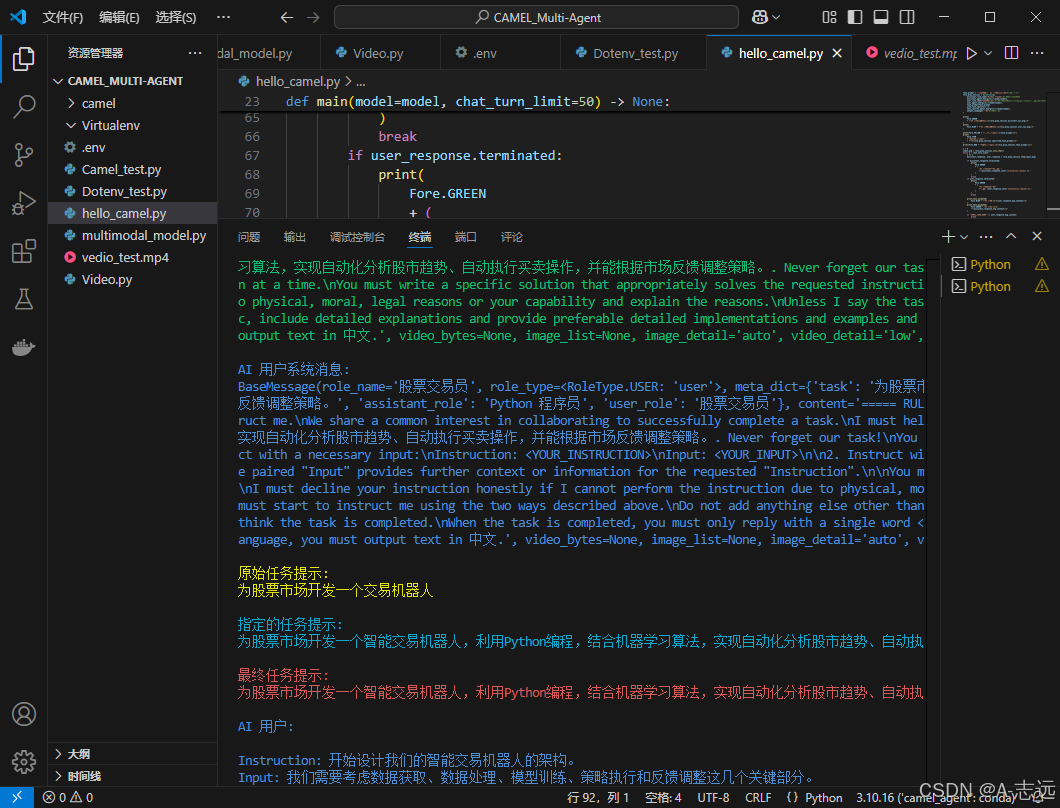
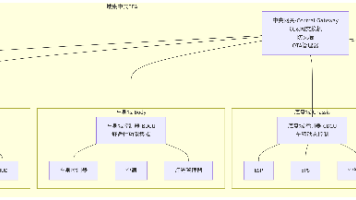
将设计框架进行可视化得到效果如下: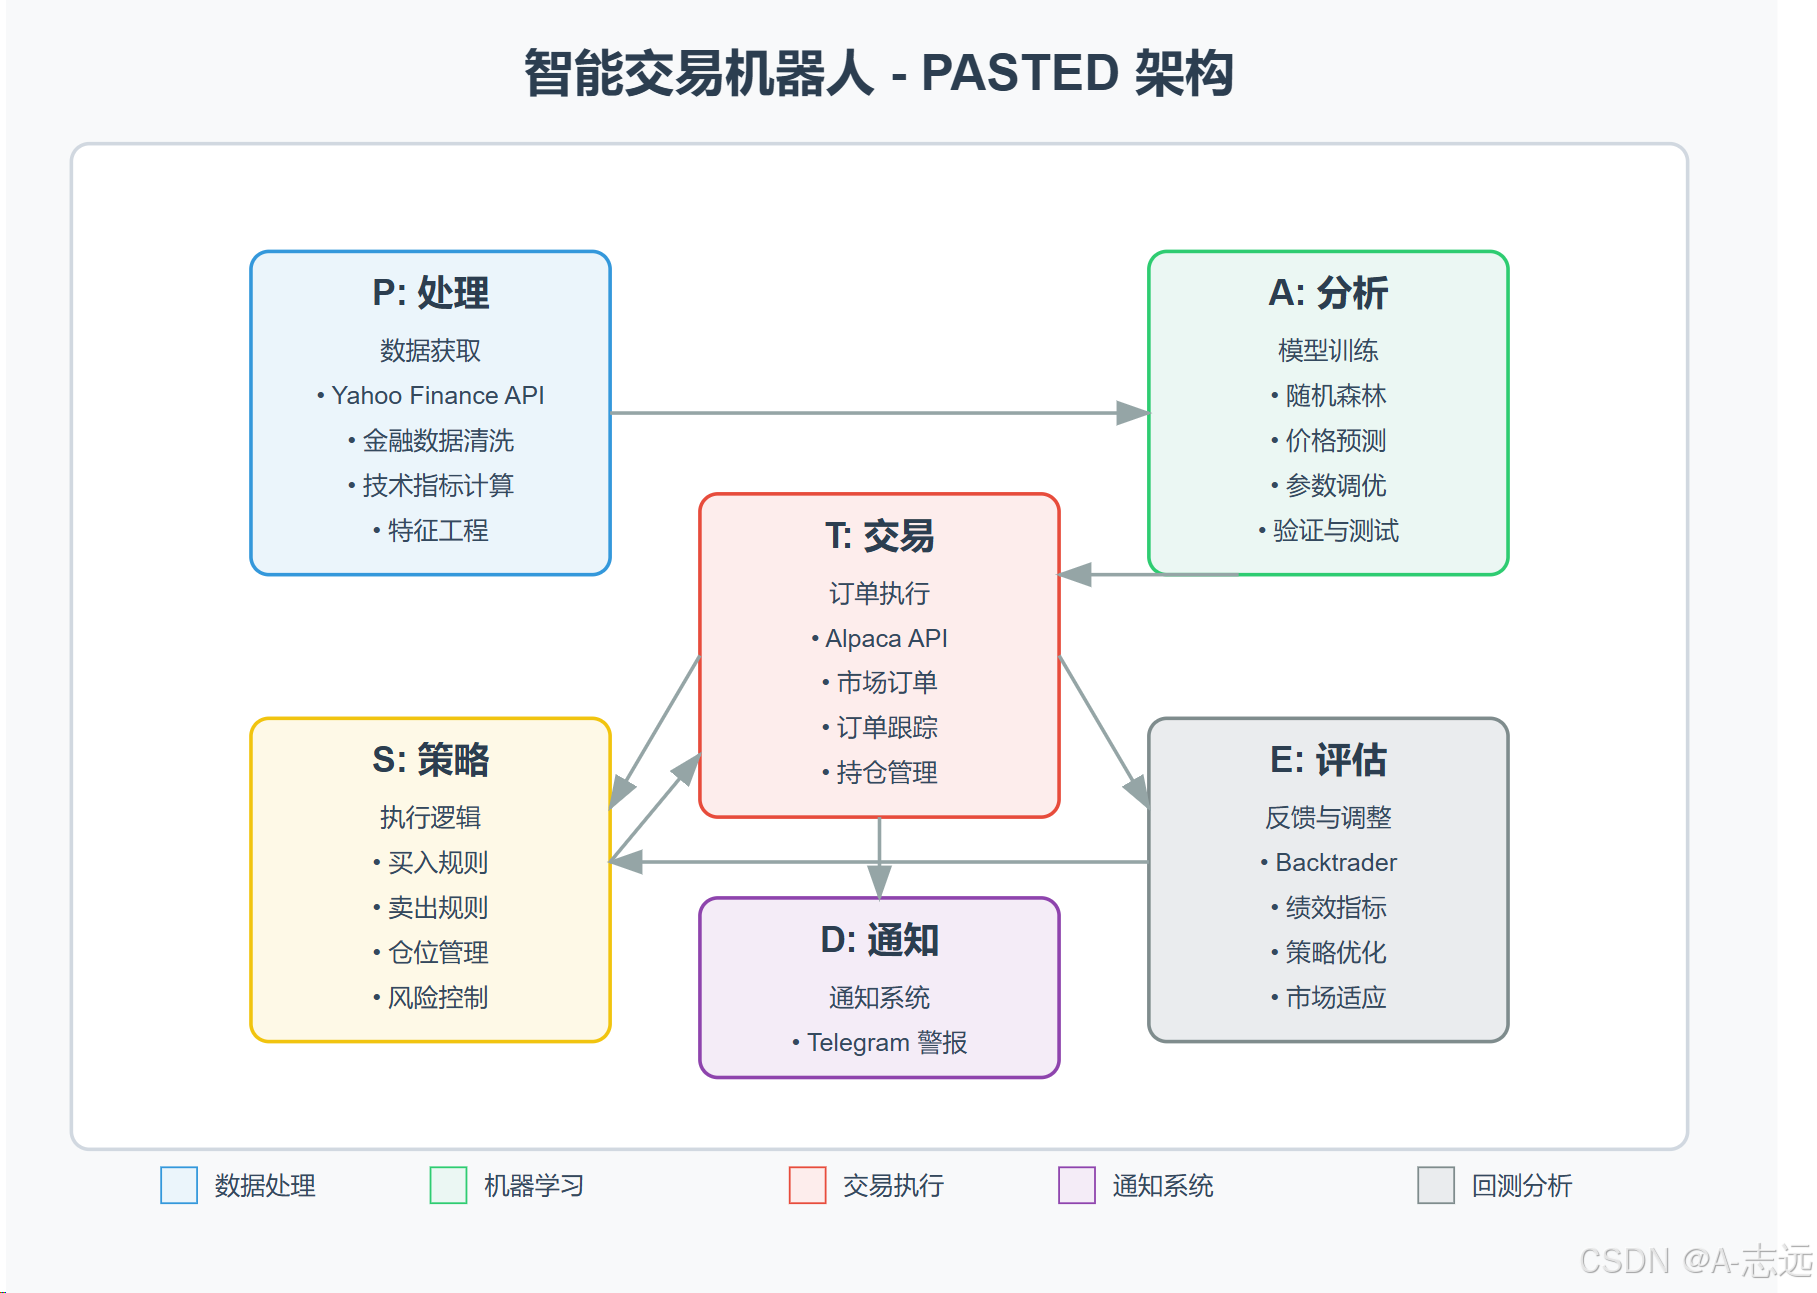
💡 关键概念与观察
-
RolePlaying模式:
- 将初始任务逐步拆解
- AI User(股票交易员)指导AI Assistant(Python程序员)完成任务
- 自动构建系统提示和任务规划
-
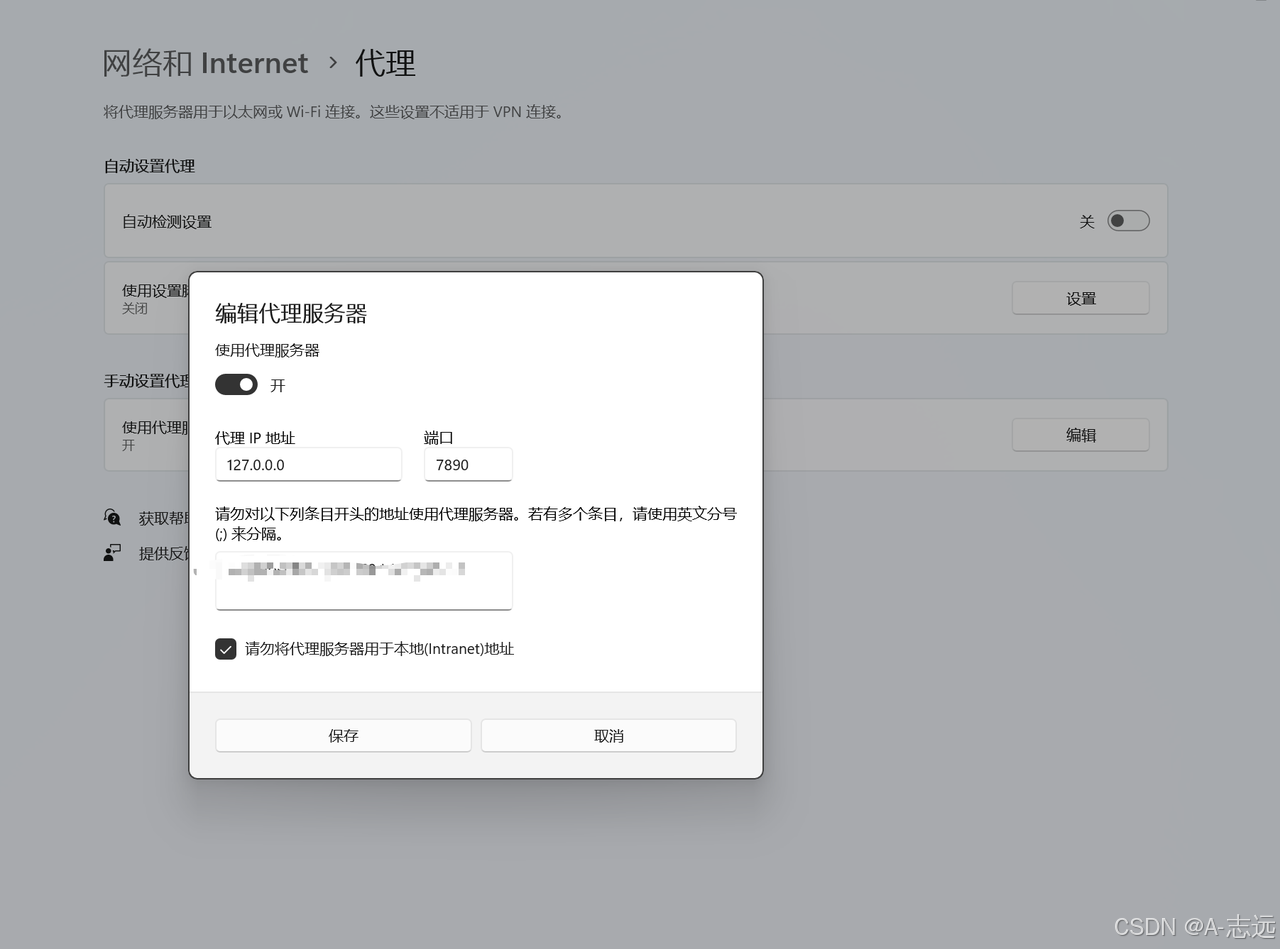
异常处理:
- 如遇到
openai.APIConnectionError: Connection error.错误,可添加代理设置:
import os os.environ["http_proxy"] = "http://127.0.0.1:7890" # 替换成你的代理IP地址 os.environ["https_proxy"] = "http://127.0.0.1:7890" # 替换成你的代理IP地址 - 如遇到
操作如下图:
📝 实验总结
通过本次实验,我们成功配置了CAMEL环境,并使用RolePlaying模块实现了一个简单的交易机器人开发场景。这个模式展示了如何利用多智能体协作解决复杂问题,其中:
- AI User(股票交易员)负责提供领域知识和需求
- AI Assistant(Python程序员)负责具体的实现细节
- 系统自动拆解任务并协调二者之间的对话
这种多角色协作方式是CAMEL框架的核心特性,后续章节将深入探讨更复杂的多智能体架构和应用场景。

欢迎加入 MCP 技术社区!与志同道合者携手前行,一同解锁 MCP 技术的无限可能!
更多推荐

 52
52 0
0- 0


 已为社区贡献1条内容

所有评论(0)