Angular封装组件
Angular封装组件Angular的页面结构就是多个组件的结合,由父组嵌套子组件,组件之前互相跳转形成的一个框架整体。封装一个组件相当于做一个子组件,这样父组件就可以通过调用这个子组件的方式使用这个子组件的功能及其样式。现将组件分为两种:(1)功能组件(占有页面少的一个功能整体):如搜索框、下拉框;(2)页面组件(占有比较大的页面篇幅):如时间轴、新增页面、编辑页面。做好一个组件,在...
Angular封装组件
Angular的页面结构就是多个组件的结合,由父组嵌套子组件,组件之前互相跳转形成的一个框架整体。
封装一个组件相当于做一个子组件,这样父组件就可以通过调用这个子组件的方式使用这个子组件的功能及其样式。
现将组件分为两种:
(1)功能组件(占有页面少的一个功能整体):如搜索框、下拉框;
(2)页面组件(占有比较大的页面篇幅):如时间轴、新增页面、编辑页面。
做好一个组件,在组件内实现好组件的功能及样式后,最主要的是考虑如何引用并控制这个组件,那么我们就需要用到数据绑定:在Angular中定义了属性绑定[value]/事件绑定(value)/双向绑定[(ngModel)]。
属性绑定:[]
father.template.html
<cmt-child [data]='data'></cmt-child>
father.component.ts
data: any = '我是传往子组件的值'
child.component.ts
import { Component, OnInit, Input } from '@angular/core';
@Input() data: any;//接收父组件的值

ngOnInit() {
      console.log(this.data)
}
事件绑定:()
child.component.html
<button (click)='checkedCallback()'>点击传值给父组件</button>
child.component.ts
import { Component, OnInit, Output, EventEmitter } from '@angular/core';
@Output() checkedBack = new EventEmitter();
id:any ="我是传给父组件的值"
checkedCallback() {
	this.checkedBack.emit(this.id);
}
father.component.html
<cmt-child (checkedBack)="checkedBack($event)"></cmt-child>
father.component.ts
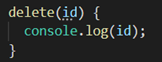
checkedBack(event) { console.log(event)}
双向绑定:[()]
father.component.html
[(inputModel)]="selectId"
child.component.ts
import { Component, OnInit, Input, Output, EventEmitter} from '@angular/core';
@Input() inputModel;
@Output() inputModelChange: EventEmitter<any> = new EventEmitter<any>();
ngOnInit() {
   console.log(this.data);
}
changeValue() {
	this.inputModelChange.emit(5);
}
例子:
child.component.html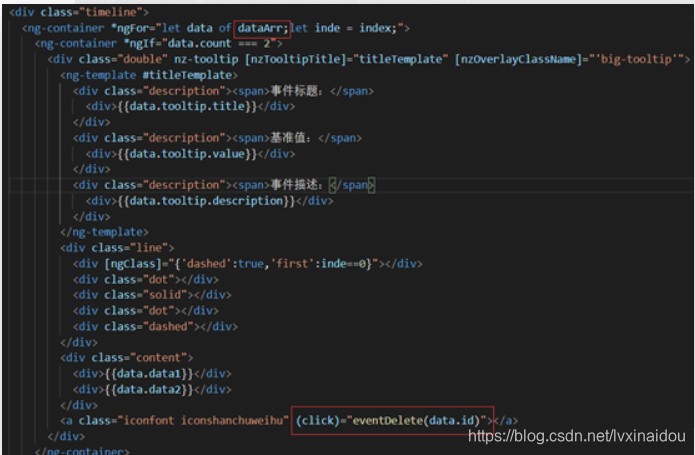
child.component.ts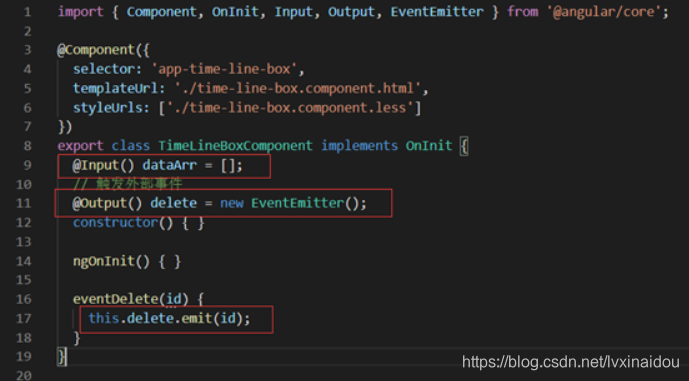
father.component.html
father.component.ts
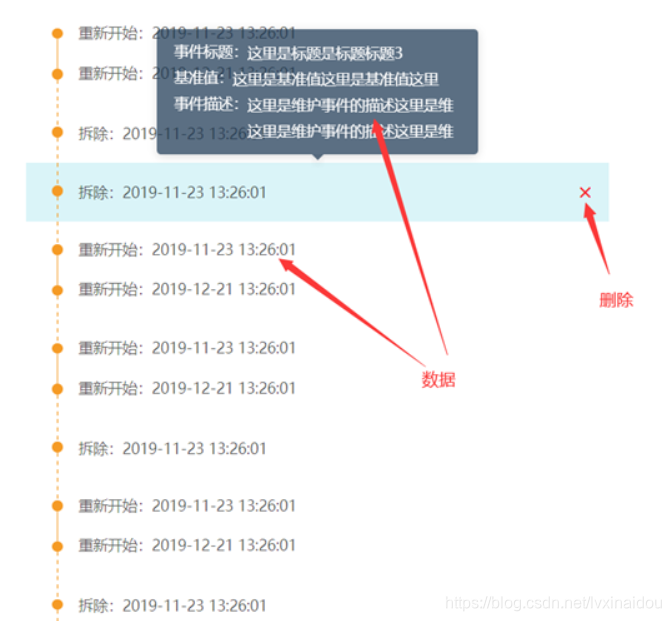
例2:测区下拉框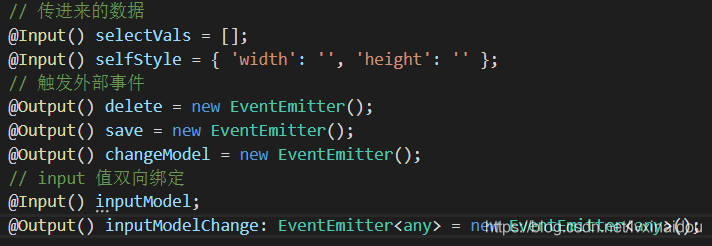
总结:封装组件考虑更多的是:(1)功能的整体性是否适合封装成一个组件(2)对于数据绑定的分析要全面。

欢迎加入 MCP 技术社区!与志同道合者携手前行,一同解锁 MCP 技术的无限可能!
更多推荐


 0
0 0
0- 0


 已为社区贡献1条内容

所有评论(0)