[Wokwi模拟器] ESP32无实物入门教程(四):Wi-Fi联网、HTTP通信与大模型API实战
本课聚焦ESP32的联网通信能力与AI云服务接入实践。学生将掌握ESP32连接Wi-Fi、使用HTTPClient库发送GET请求、接收JSON数据并通过串口调试查看网页内容。课程还引入ArduinoJson库,指导学生提取API返回的关键字段,完成基础数据解析。进阶部分,学生将在ESP32上调用火山引擎大语言模型API,体验微控制器接入AI模型的全过程,感受边缘设备与智能云服务结合的强大潜力。课
第4课:ESP32 Wi-Fi联网通讯基础
课程导语
ESP32是一款性价比极高的微控制器,广泛应用于物联网开发。相比传统MCU,它最大的优势在于自带2.4GHz Wi-Fi与蓝牙模块,同时价格低廉、资源丰富,非常适合入门级联网项目开发。在本课中,我们将从ESP32连接Wi-Fi网络入手,逐步学习HTTP通信的基本操作。
教学目标
-
掌握ESP32连接Wi-Fi热点的基本流程。
-
学会使用HTTPClient库发送GET请求,并接收网页数据。
-
了解网络通信的基础流程与串口调试技巧。
所需器件
- ESP32 DevKitC V4开发板(无需额外硬件)
实验1:连接Wi-Fi并获取网页内容
原理讲解
ESP32自带Wi-Fi模块,可以连接2.4GHz无线网络并通过HTTP协议与服务器通信。使用WiFi.h连接网络,HTTPClient.h库用于发送HTTP请求。
实验代码
#include <WiFi.h>
#include <HTTPClient.h>

const char* ssid = "Wokwi-GUEST";  // 设置Wi-Fi名称(SSID)
const char* password = "";         // Wokwi默认无需密码

void setup() {
  Serial.begin(115200);            // 初始化串口,波特率115200
  WiFi.begin(ssid, password);      // 启动Wi-Fi连接

  Serial.print("Connecting to WiFi");
  unsigned long startAttemptTime = millis();  // 记录开始尝试连接时间

  // 等待连接成功,最多尝试10秒
  while (WiFi.status() != WL_CONNECTED && millis() - startAttemptTime < 10000) {
    delay(500);
    Serial.print(".");
  }

  if (WiFi.status() == WL_CONNECTED) {
    Serial.println("\nConnected!");
  } else {
    Serial.println("\nFailed to connect to WiFi.");
  }
}

void loop() {
  // 每次循环判断是否已连接Wi-Fi
  if (WiFi.status() == WL_CONNECTED) {
    HTTPClient http;  // 创建HTTP客户端对象

    // 设置要请求的网页地址,可替换为其他API
    http.begin("https://jsonplaceholder.typicode.com/todos/1");

    // 发送GET请求,获取返回状态码
    int httpCode = http.GET();

    // 检查返回值是否为正数(>0 表示请求成功)
    if (httpCode > 0) {
      String payload = http.getString();  // 获取返回内容
      Serial.println(payload);            // 打印返回的网页内容
    } else {
      // 请求失败时输出错误信息
      Serial.printf("HTTP GET failed, error: %s\n", http.errorToString(httpCode).c_str());
    }

    http.end();  // 关闭连接释放资源
  } else {
    // 若Wi-Fi断开,可考虑重连机制
    Serial.println("WiFi not connected. Trying to reconnect...");
    WiFi.begin(ssid, password);
  }

  delay(10000);  // 每10秒请求一次
}
WiFi.status() 函数详解
WiFi.status() 是 ESP32 提供的一个函数,用来获取当前 Wi-Fi 模块的连接状态,返回的是一个“状态码”(本质上是整数),但通常我们用一些宏常量来表示,更容易读懂。
返回值一览(常见的几种):
| 宏常量(返回值) | 数值 | 含义说明 |
|---|---|---|
WL_IDLE_STATUS |
0 | 模块空闲中,尚未开始连接 |
WL_NO_SSID_AVAIL |
1 | 找不到指定名称的Wi-Fi热点 |
WL_SCAN_COMPLETED |
2 | 扫描完成(一般不会手动用到) |
WL_CONNECTED |
3 | ✅ 已成功连接到Wi-Fi |
WL_CONNECT_FAILED |
4 | 连接失败(如密码错误) |
WL_CONNECTION_LOST |
5 | 连接中断(Wi-Fi信号丢失) |
WL_DISCONNECTED |
6 | 尚未连接任何Wi-Fi |
效果演示
串口输出样例
{
  "userId": 1,
  "id": 1,
  "title": "delectus aut autem",
  "completed": false
}
教学提示
-
实际项目中建议加入以下功能:
-
连接超时检测(如上面代码所示)
-
Wi-Fi断线重连机制(见
loop()中的重连逻辑) -
请求失败时等待重试或切换备用服务器
-
-
可以尝试编写
connectToWiFi()函数模块化连接流程,增强代码复用性与结构性。
练习题
-
替换请求地址:
尝试使用以下公开API,获取不同内容,例如每日一句:http.begin("https://api.quotable.io/random"); // 获取一段英文短句 -
添加OLED显示功能:
将获取到的网页内容显示在OLED屏幕上
实验二:处理JSON数据
认识JSON
实验一的串口输出样例,实际就是json的数据格式,再举个例子帮助你理解json数据格式:
{
  "购物日期": "2025-04-06",
  "顾客": {
    "姓名": "张三",
    "会员": true,
    "联系方式": {
      "电话": "13800001111",
      "邮箱": "zhangsan@example.com"
    }
  },
  "购物清单": [
    {
      "名称": "苹果",
      "种类": "水果",
      "数量": 3
    },
    {
      "名称": "西红柿",
      "种类": "蔬菜",
      "数量": 2
    }
  ]
}
由此可见JSON特点
-
键值对:JSON 是由一组组“名字 : 数据”组成的,就像
"姓名": "张三"表示这个人叫张三。 -
嵌套对象:有时候,一个键存储的不是普通数据,而是另一个“对象”,用
{}包起来。比如"顾客"里面还有"联系方式",而"联系方式"里又有"电话"和"邮箱",就像一层一层的小盒子。 -
数组+嵌套对象:
"购物清单"是一个数组(用[]括起来),里面每一项是一个商品对象(用{}表示)。这在表示订单、数据列表等时候非常常见。
因此无论是用户信息、设备配置、购物订单、API返回结果……现实中经常会用 JSON 来描述这些结构,它简单、清晰、适合用代码读取和处理。
ArduinoJson库处理json数据
一般api提取出来,都是原始的json数据,但我们只想提取我们需要的数据,怎么办呢。这里我们使用arduinojson库来处理json数据。
实例演示:解析一句话(最基础)
假设我们从网络上收到这样一段 JSON 数据👇
{
  "userId": 1,
  "id": 1,
  "title": "delectus aut autem",
  "completed": false
}
我们来写代码把这些字段都提取出来。
✅ 步骤 1:准备代码
#include <WiFi.h>
#include <HTTPClient.h>
#include <ArduinoJson.h>
const char* ssid = "Wokwi-GUEST";
const char* password = "";
void setup() {
Serial.begin(115200);
WiFi.begin(ssid, password);
while (WiFi.status() != WL_CONNECTED) {
delay(500);
Serial.print(".");
}
Serial.println("\nWiFi connected!");
HTTPClient http;
http.begin("https://jsonplaceholder.typicode.com/todos/1");
int httpCode = http.GET();
if (httpCode > 0) {
String payload = http.getString(); // 获取 JSON 字符串
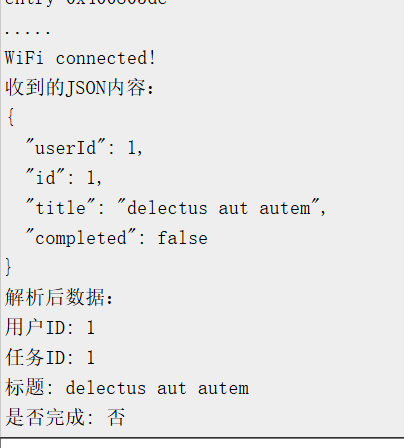
Serial.println("收到的JSON内容:");
Serial.println(payload);
// 创建 JSON 容器
DynamicJsonDocument doc(512);
// 解析 JSON
DeserializationError error = deserializeJson(doc, payload);
if (error) {
Serial.print("解析失败:");
Serial.println(error.c_str());
return;
}
// 提取字段
int userId = doc["userId"];
int id = doc["id"];
String title = doc["title"];
bool completed = doc["completed"];
// 打印结果
Serial.println("解析后数据:");
Serial.printf("用户ID: %d\n", userId);
Serial.printf("任务ID: %d\n", id);
Serial.printf("标题: %s\n", title.c_str());
Serial.printf("是否完成: %s\n", completed ? "是" : "否");
} else {
Serial.printf("请求失败,错误代码:%d\n", httpCode);
}
http.end();
}
void loop() {}
💡 重点解释:
| 代码行 | 含义 |
|---|---|
DynamicJsonDocument doc(512); |
分配 512 字节空间,足够解析这份数据 |
deserializeJson(doc, payload); |
把 String 转换为 JSON 对象 |
doc["title"] |
从 JSON 中提取字段值 |
completed ? "是" : "否" |
布尔值转换成汉字显示,方便读懂 |
✅ 串口输出示例:
🧩 补充:嵌套结构怎么解析?
假设你收到的数据更复杂,比如:
{
  "user": {
    "name": "张三",
    "age": 20
  }
}
你可以这样读取嵌套字段:
String name = doc["user"]["name"];  // 多层访问
int age = doc["user"]["age"];
🎯 小结
拿到 JSON 字符串 → 放进 JSON 容器 → 通过键名提取值
拓展实验:ESP32调用豆包大语言模型API(火山引擎平台)
在ESP32中,我们可以连接Wi-Fi热点,并调用大模型API(如火山引擎的通义千问、多模态模型等)。最近火山引擎部分模型可以免费体验50万Token,因此这里选择火山引擎测试。
示例完整代码(复制粘贴,体验即可)
#include <WiFi.h>
#include <HTTPClient.h>
#include <WiFiClientSecure.h>
const char* ssid = "Wokwi-GUEST";
const char* password = "";
// API 密钥(请自行替换)
const char* api_key = "你的API Key";
void setup() {
Serial.begin(115200);
WiFi.begin(ssid, password);
Serial.print("Connecting to WiFi");
while (WiFi.status() != WL_CONNECTED) {
delay(500);
Serial.print(".");
}
Serial.println("\nWiFi connected");
}
void loop() {
if (WiFi.status() == WL_CONNECTED) {
HTTPClient http;
http.setTimeout(15000); // 增加超时时间
http.begin("https://ark.cn-beijing.volces.com/api/v3/chat/completions");
http.addHeader("Content-Type", "application/json");
http.addHeader("Authorization", "Bearer " + String(api_key));
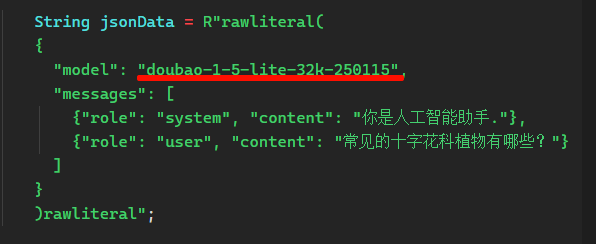
String jsonData = R"rawliteral(
{
"model": "doubao-1-5-lite-32k-250115",
"messages": [
{"role": "system", "content": "你是人工智能助手."},
{"role": "user", "content": "常见的十字花科植物有哪些?"}
]
}
)rawliteral";
int httpResponseCode = http.POST(jsonData);
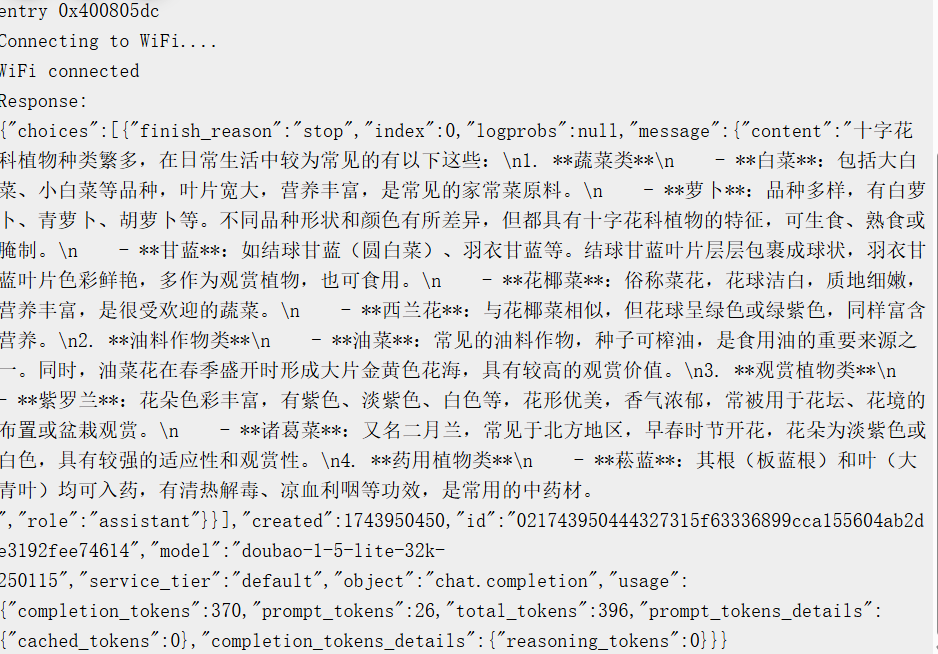
if (httpResponseCode > 0) {
String response = http.getString();
Serial.println("Response:");
Serial.println(response);
} else {
Serial.printf("POST failed, error: %s\n", http.errorToString(httpResponseCode).c_str());
}
http.end();
} else {
Serial.println("WiFi disconnected, reconnecting...");
WiFi.begin(ssid, password);
}
delay(15000); // 每15秒请求一次
}
使用说明
-
const char* api_key = "你的API Key";中替换为你自己的API。 -
如果API返回JSON,推荐使用 ArduinoJson 库解析内容。
效果展示
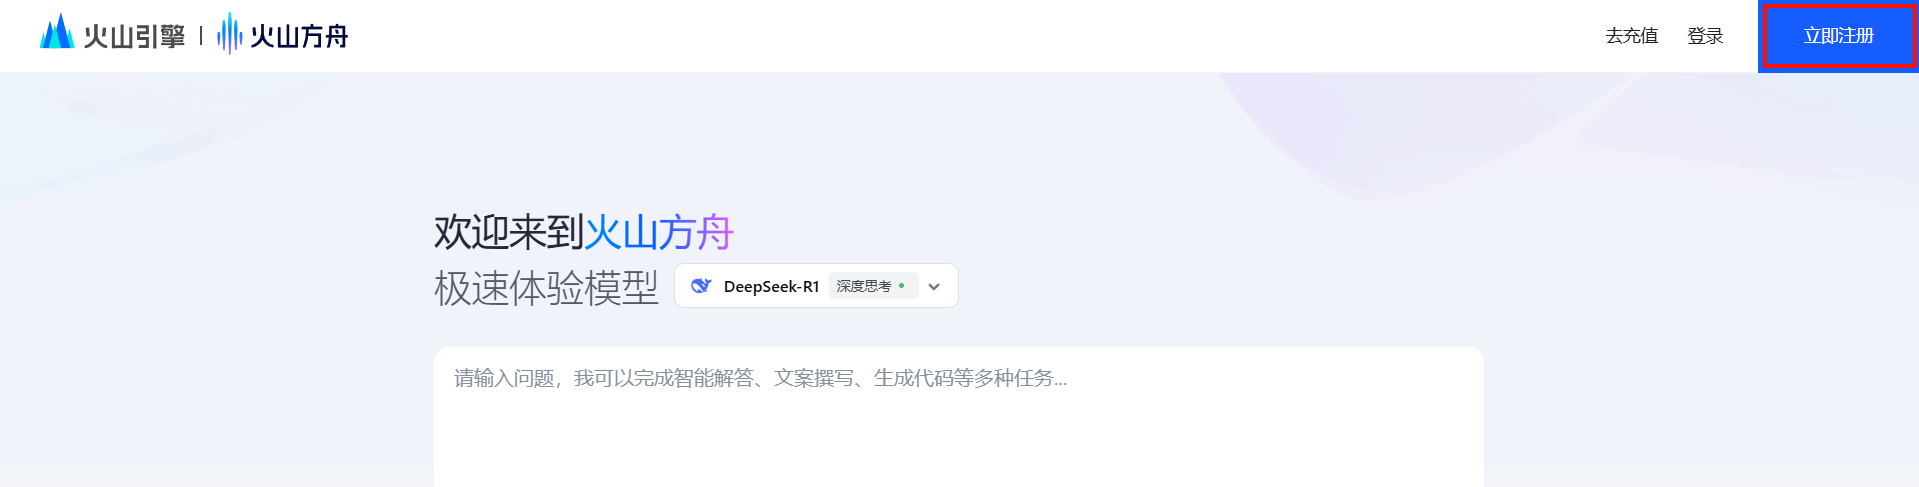
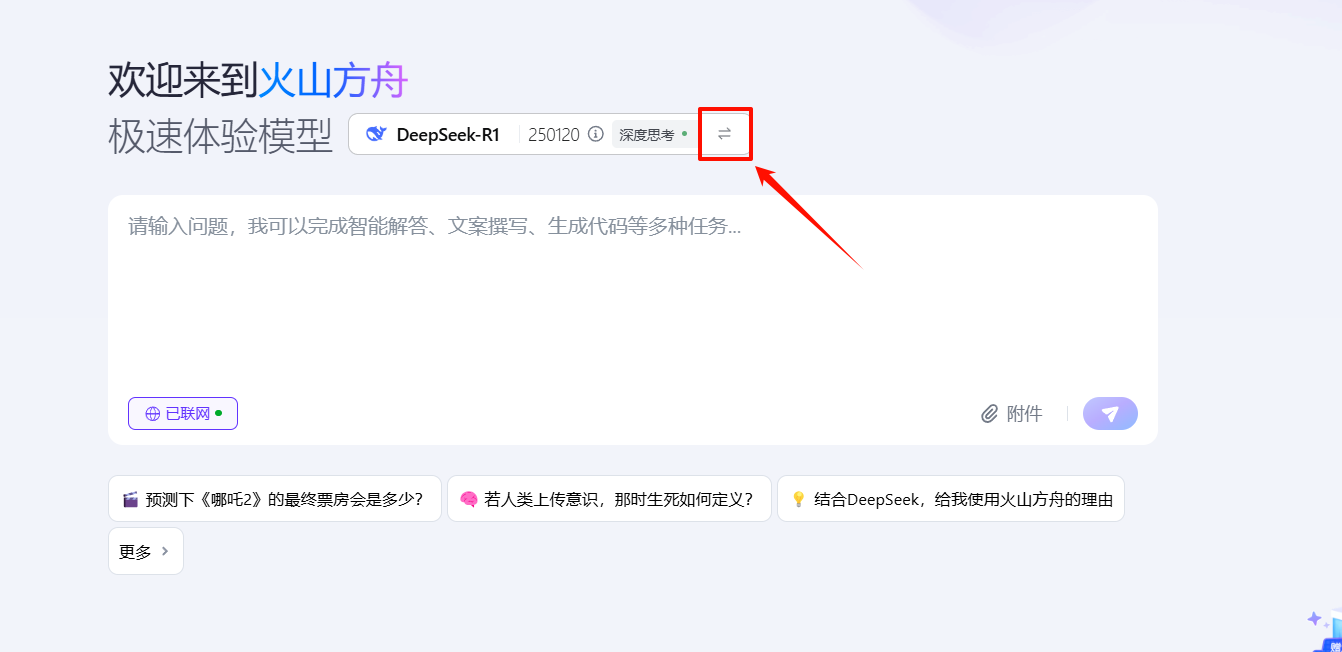
火山引擎大模型API获取
1.创建账号
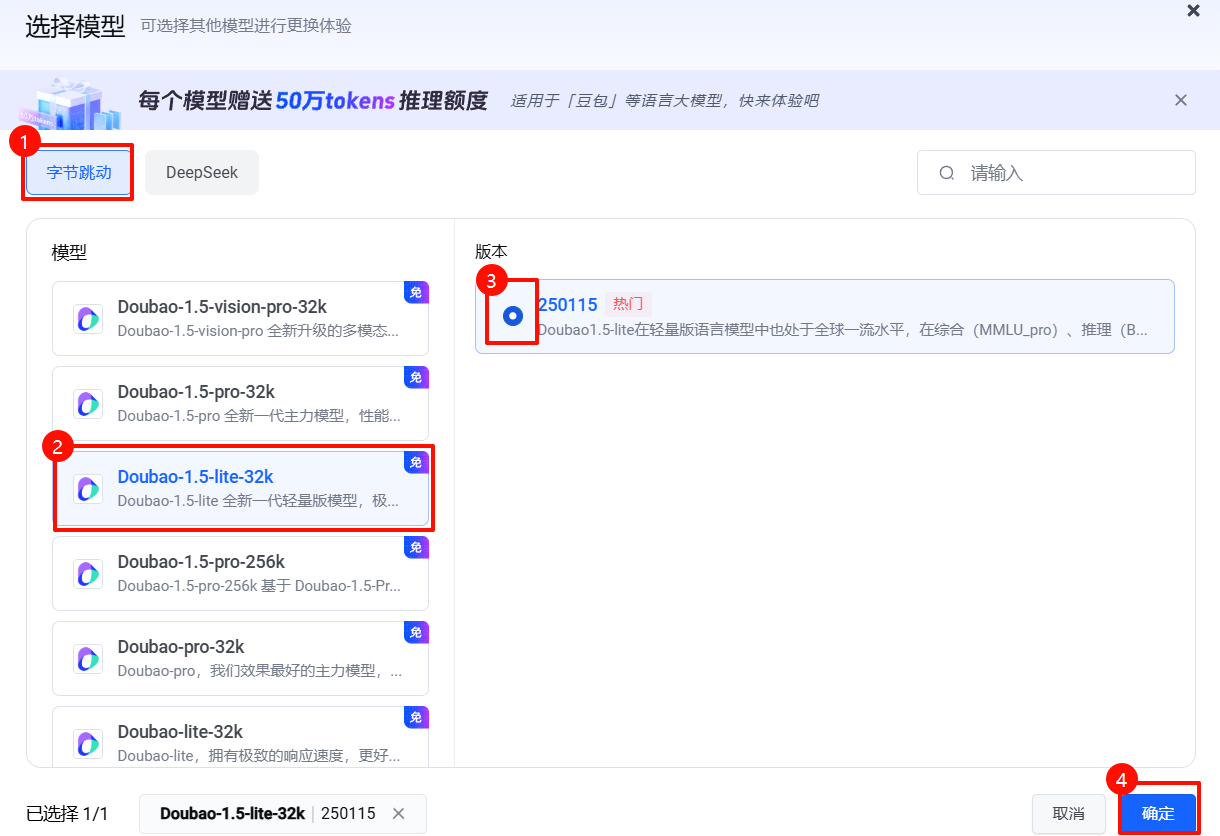
2.切换模型
3.获取api key
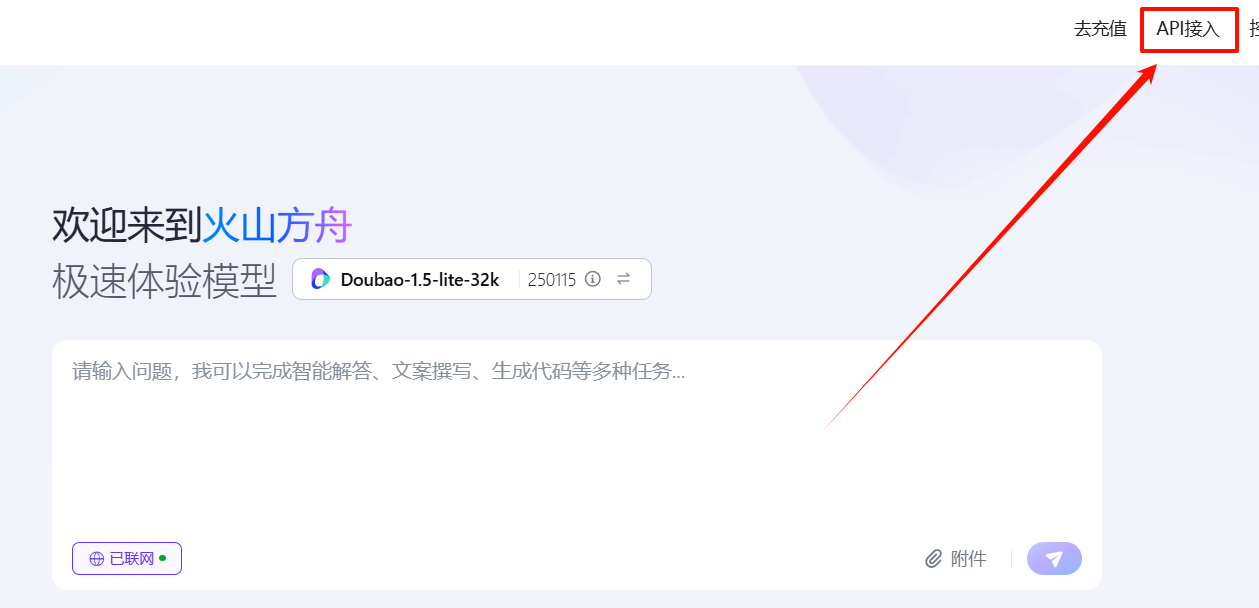
点击眼睛查看复制api,如果显示还未创建api就先创建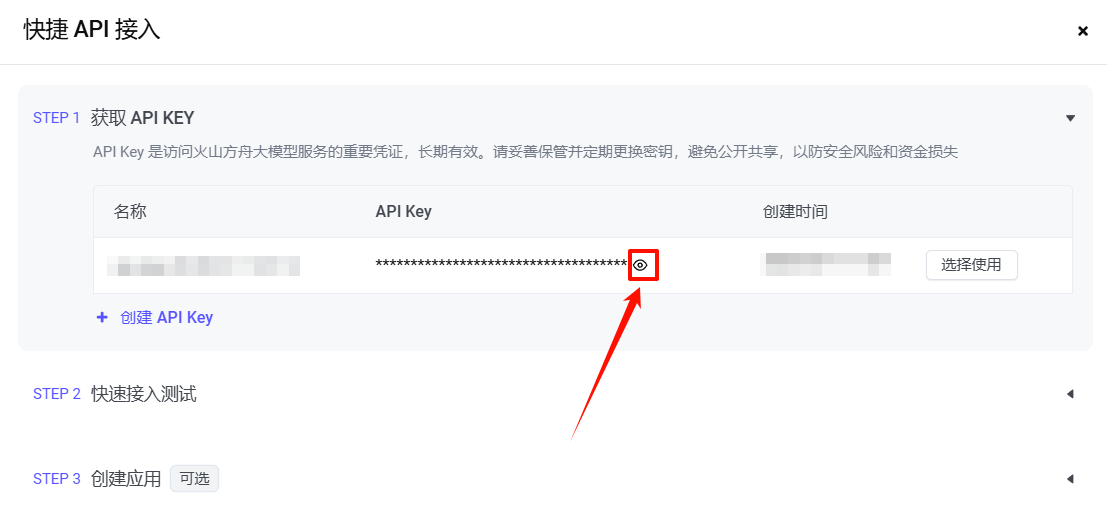
4.把api复制到示例代码就行了
为什么要选这个模型?
因为示例代码用的是这个模型,如果你要用其他的模型,还要把其他模型的模型名称在 model 那边替换

欢迎加入 MCP 技术社区!与志同道合者携手前行,一同解锁 MCP 技术的无限可能!
更多推荐


 25
25 0
0- 0


 已为社区贡献1条内容

所有评论(0)