【大模型】大模型(Qwen2.5)_监督微调(SFT)教程_AutoDL
本教程可在的 4090 GPU 实例上运行。
大模型(Qwen2.5_Coder_3B) 监督微调教程
本教程主要目的是完成 在 AutoDL 的GPU服务器 4090 上,对 大模型(Qwen2.5_Coder_3B)继续监督微调,所使用的数据集是 “FineTome-100k”。
当然,也可以使用其他类型的GPU,实现训练过程中 24G的显存也只用到了7G, 模型可以完美切换到其他Qwen模型进行微调,我这里只是为了演示选择了较少的3B模型。
教程内容
本教程将介绍以下内容:
- AutoDL配置 - 如何启动相应配置的GPU实例
- 安装依赖库 - 如何安装python依赖包
- 模型准备 - 如何下载和初始化模型
- 数据准备 - 如何准备和处理训练数据
- 模型训练 - 如何训练和优化模型
- 模型保存 - 如何保存训练结果
- 模型推理 - 如何使用训练好的模型进行推理
【本教程代码 】: https://github.com/songxia928/LLM/blob/main/01_%E5%A4%A7%E6%A8%A1%E5%9E%8BQwen2.5_%E6%8C%87%E4%BB%A4%E5%BE%AE%E8%B0%83_LORA.ipynb
0.AutoDL配置
- 为什么选择 AutoDL?: 相对于其他云服务器厂商,AutoDL卡相对便宜很多,而且操作相对简单,上手成本很低。
- 如何配置?: GPU: RTX 4090(24GB) * 1。 镜像: PyTorch 2.3.0 --> Python 3.12(ubuntu22.04) --> CUDA 12.1

1.安装依赖库
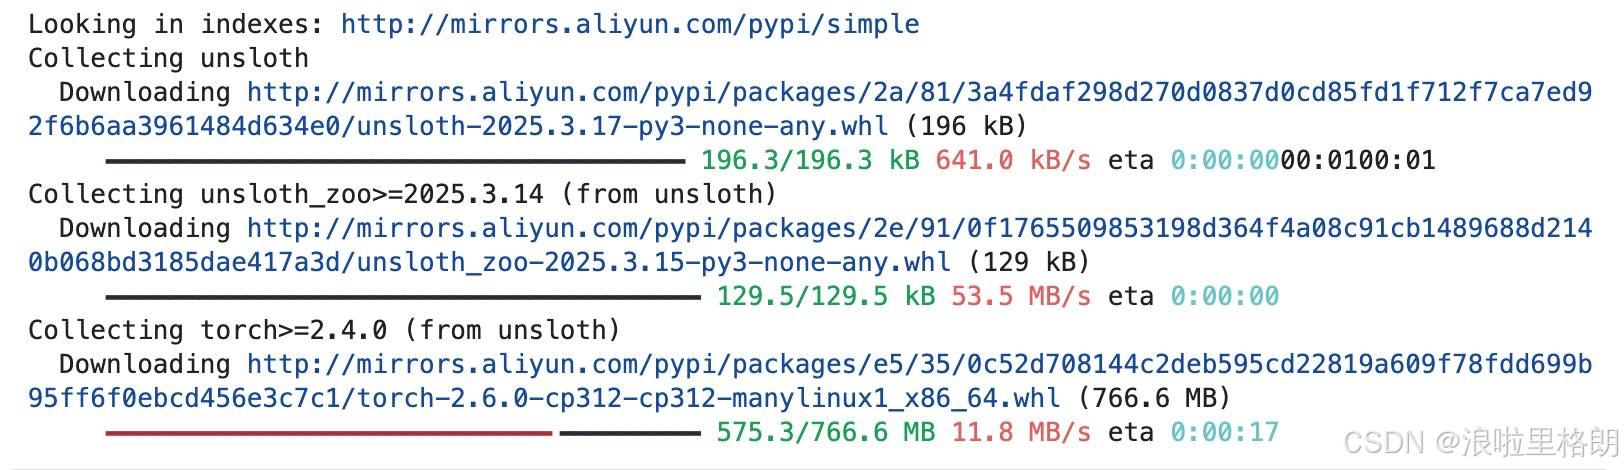
!pip install unsloth
!pip install modelscope==1.9.0
!pip install datasets==2.21.0
!pip install addict
!pip install vllm
2.模型准备
2.1下载模型
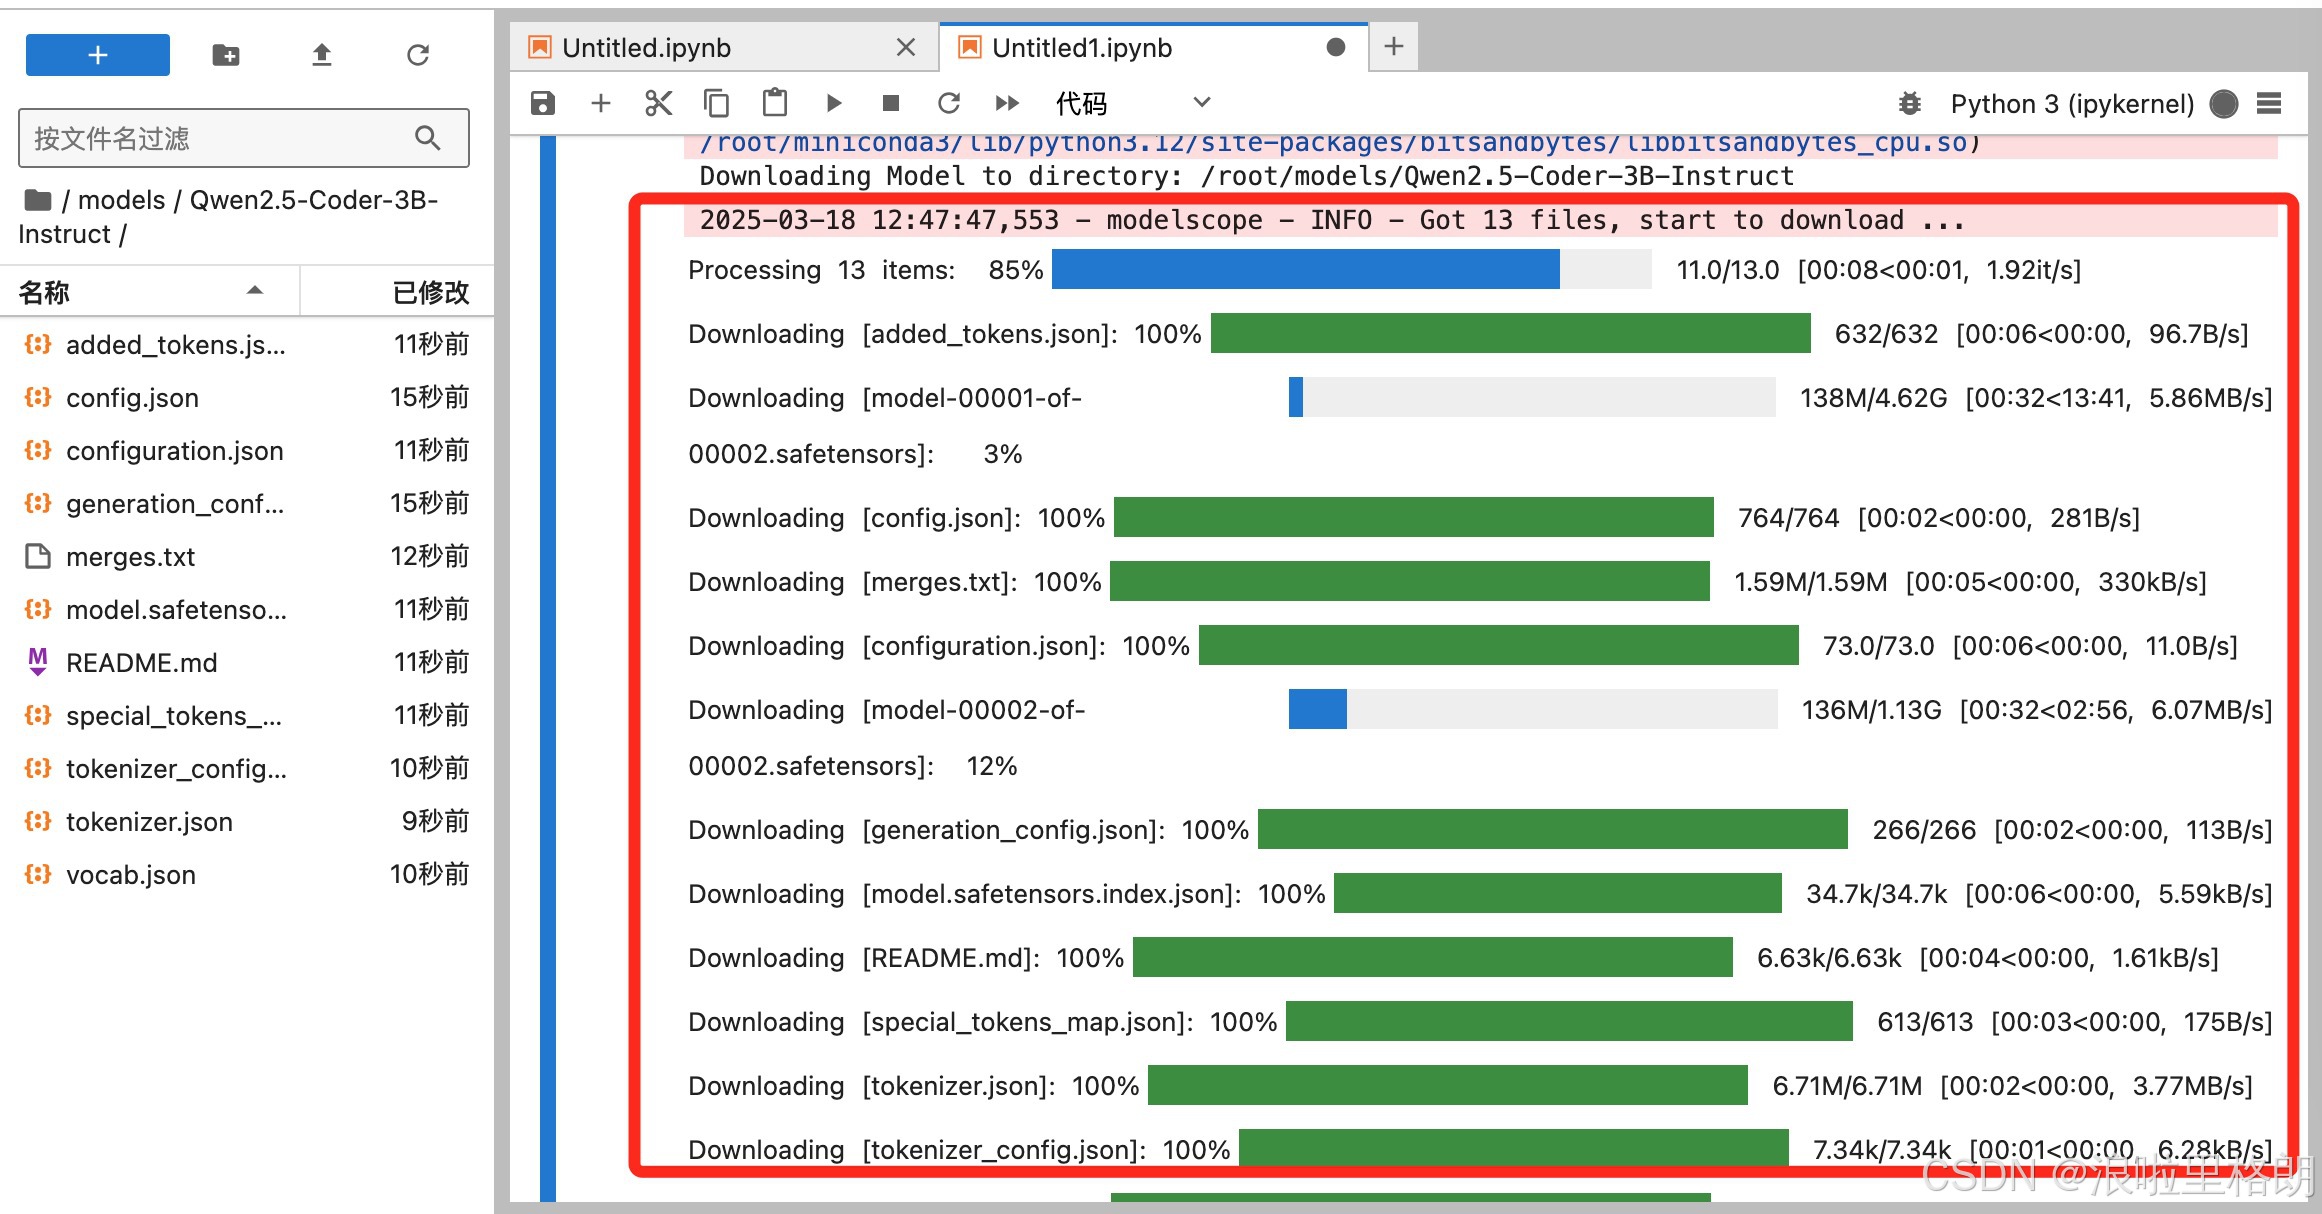
from modelscope.hub.snapshot_download import snapshot_download

model_name = "unsloth/Qwen2.5-Coder-3B-Instruct"
local_dir = "./models/Qwen2.5-Coder-3B-Instruct"
snapshot_download(model_name, local_dir=local_dir)
hugging face 也有对应的模型,但是AutoDL不能直接访问 hugging face,可以在本地PC下载,再上传到AutoDL,如下面的方式。但是这种方式比较复杂,不推荐。
2.2 模型初始化
from unsloth import FastLanguageModel

# 基础配置参数
max_seq_length = 2048 # 最大序列长度
dtype = None # 自动检测数据类型
load_in_4bit = True # 使用4位量化以减少内存使用


# 加载预训练模型和分词器
model, tokenizer = FastLanguageModel.from_pretrained(
    model_name = local_dir, # "unsloth/Qwen2.5-Coder-32B-Instruct", # 选择Qwen2.5 3B指令模型
    max_seq_length = max_seq_length,
    dtype = dtype,
    load_in_4bit = load_in_4bit,
)


model = FastLanguageModel.get_peft_model(
    model,
    r = 16, # LoRA秩,控制可训练参数数量
    target_modules = ["q_proj", "k_proj", "v_proj", "o_proj",
                      "gate_proj", "up_proj", "down_proj",], # 需要训练的目标模块
    lora_alpha = 16, # LoRA缩放因子
    lora_dropout = 0, # LoRA dropout率
    bias = "none", # 是否训练偏置项
    use_gradient_checkpointing = "unsloth", # 使用梯度检查点节省显存
    random_state = 3407, # 随机数种子
    use_rslora = False, # 是否使用稳定版LoRA
    loftq_config = None, # LoftQ配置
)
2.3 未经过训练的模型推理
import torch
from transformers import GenerationConfig
# 应用聊天模板
text = tokenizer.apply_chat_template([
{"role": "user", "content": "How many r's are in strawberry?"}
], tokenize=False, add_generation_prompt=True)
# 配置生成参数
generation_config = GenerationConfig(
temperature=0.8,
top_p=0.95,
max_new_tokens=1024,
)
# 将文本转换为输入张量
input_ids = tokenizer(text, return_tensors="pt").input_ids.to(model.device)
# 使用标准的 generate 方法生成输出
with torch.no_grad():
output = model.generate(
input_ids=input_ids,
generation_config=generation_config
)
# 解码输出
output_text = tokenizer.decode(output[0], skip_special_tokens=True)
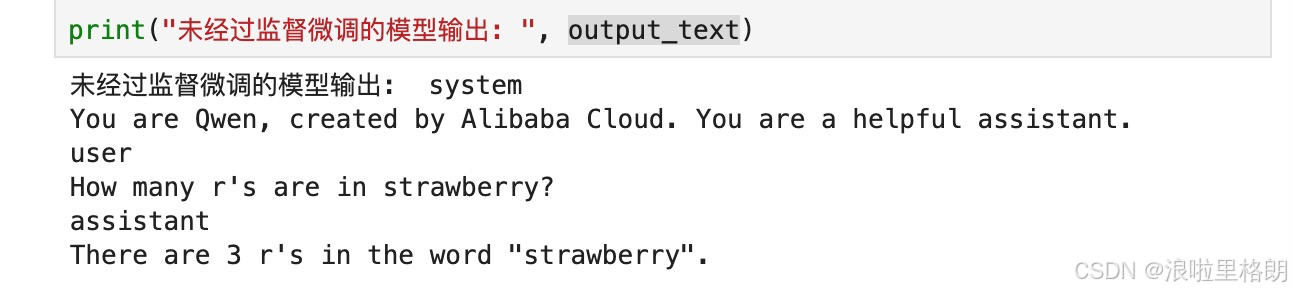
print("未经过监督微调的模型输出: ", output_text)
3. 数据准备
3.1 本地PC下载
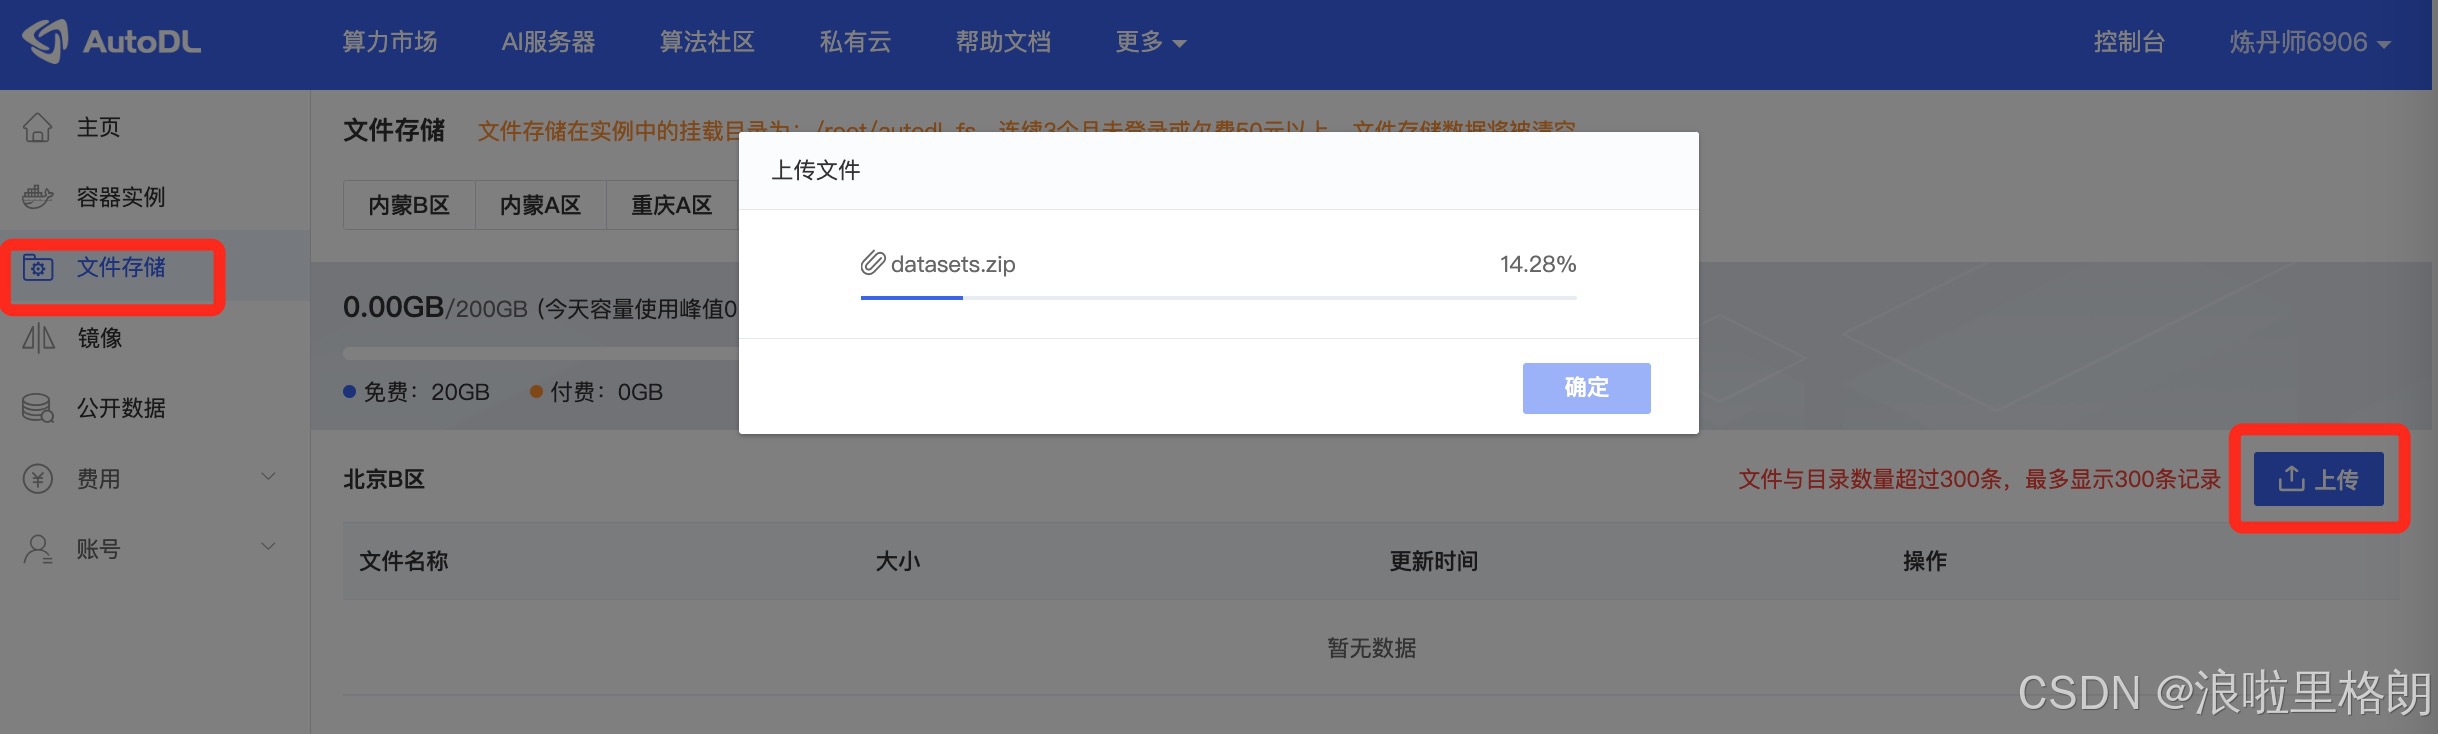
datasets 是 Hugging Face 提供的用于加载和处理各种数据集的库。AutoDL上无法直接访问 Hugging Face。 因此数据集 “mlabonne/FineTome-100k” 需要在本地PC下载后,从AutoDL的“文件存储”上传到你所使用的实例存储位置。
本地可以科学上网后,安装 pip install datasets 后,然后运行下面代码。
# 下载数据集
from datasets import load_dataset

dataset = load_dataset("mlabonne/FineTome-100k", split="train")
dataset.save_to_disk("./datasets/FineTome-100k")
print(f"数据集已成功保存到 {local_path}")

如果不能科学上网,无法下载对应数据集,我这里也提供了依据下载好的。网盘链接: https://pan.baidu.com/s/1MoVWFoEacQ4_Mu-SVaNkHg?pwd=3mp3 提取码: 3mp3
随后需要将下载的数据上传到AutoDL 对应的位子 “./datasets/FineTome-100k”。
3.2 数据加载
from datasets import load_from_disk
from unsloth.chat_templates import standardize_sharegpt

# 从本地路径加载数据集
dataset_path = "./datasets/FineTome-100k"
dataset = load_from_disk(dataset_path)
3.3 格式转换
from unsloth.chat_templates import get_chat_template
import pprint
# 配置分词器使用qwen-2.5对话模板
tokenizer = get_chat_template(
tokenizer,
chat_template = "qwen-2.5",
)
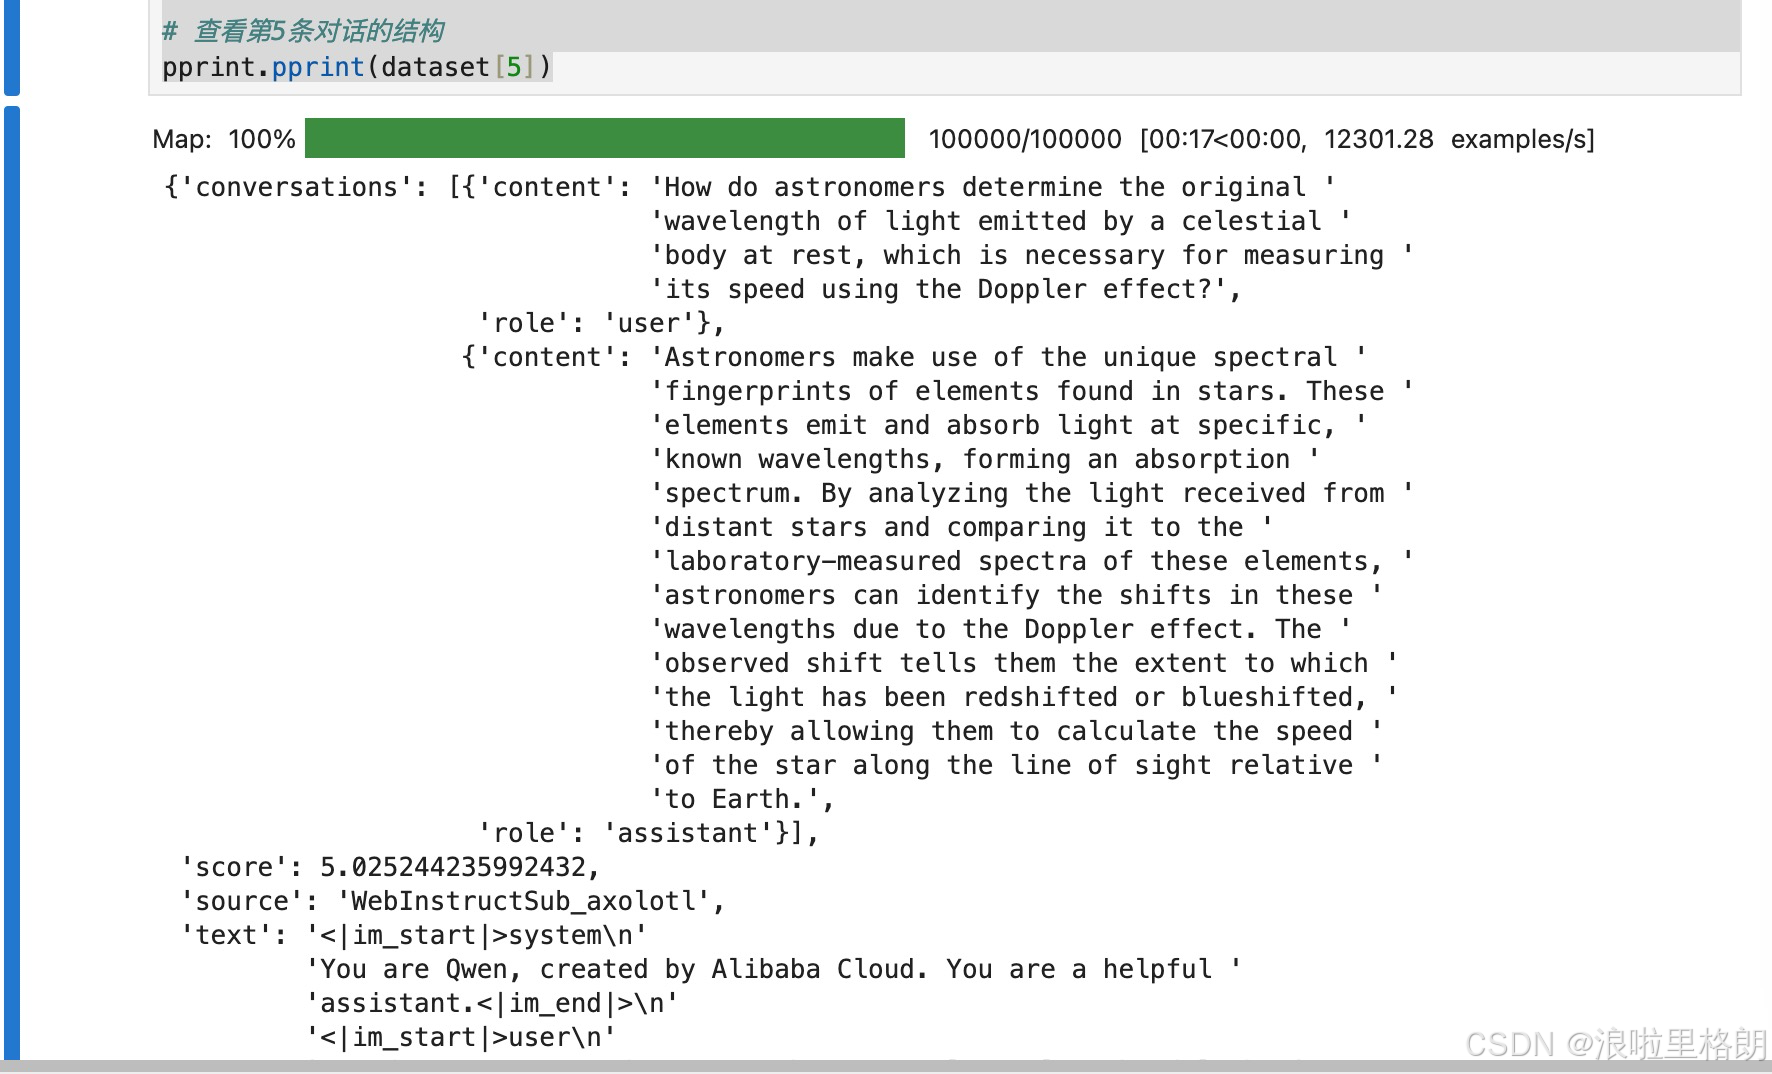
def formatting_prompts_func(examples):
"""格式化对话数据的函数
Args:
examples: 包含对话列表的字典
Returns:
包含格式化文本的字典
"""
convos = examples["conversations"]
texts = [tokenizer.apply_chat_template(convo, tokenize = False, add_generation_prompt = False) for convo in convos]
return { "text" : texts, }
from unsloth.chat_templates import standardize_sharegpt
# 标准化数据集格式
dataset = standardize_sharegpt(dataset)
dataset = dataset.map(formatting_prompts_func, batched = True,)
# 查看第5条对话的结构
pprint.pprint(dataset[5])
4. 模型训练
from trl import SFTTrainer
from transformers import TrainingArguments, DataCollatorForSeq2Seq
from unsloth import is_bfloat16_supported
# 配置训练器
trainer = SFTTrainer(
model=model,
tokenizer=tokenizer,
train_dataset=dataset,
dataset_text_field="text",
max_seq_length=max_seq_length,
data_collator=DataCollatorForSeq2Seq(tokenizer=tokenizer),
dataset_num_proc=4,
packing=False,
args=TrainingArguments(
per_device_train_batch_size=1, # 每个设备的批次大小
gradient_accumulation_steps=4, # 梯度累积步数
warmup_steps=5, # 预热步数
max_steps=100, # 最大训练步数
learning_rate=2e-4, # 学习率
fp16=not is_bfloat16_supported(), # 是否使用fp16
bf16=is_bfloat16_supported(), # 是否使用bf16
logging_steps=1, # 日志记录间隔
optim="paged_adamw_8bit", # 优化器
weight_decay=0.01, # 权重衰减
lr_scheduler_type="linear", # 学习率调度器
seed=3407, # 随机种子
output_dir="outputs", # 输出目录
report_to="none", # 不使用外部日志工具
),
)
from unsloth.chat_templates import train_on_responses_only
# 设置仅对助手回复部分计算损失
trainer = train_on_responses_only(
trainer,
instruction_part = "<|im_start|>user\n",
response_part = "<|im_start|>assistant\n",
)
# 查看输入文本
tokenizer.decode(trainer.train_dataset[5]["input_ids"])
# 查看标签掩码
space = tokenizer(" ", add_special_tokens = False).input_ids[0]
tokenizer.decode([space if x == -100 else x for x in trainer.train_dataset[5]["labels"]])
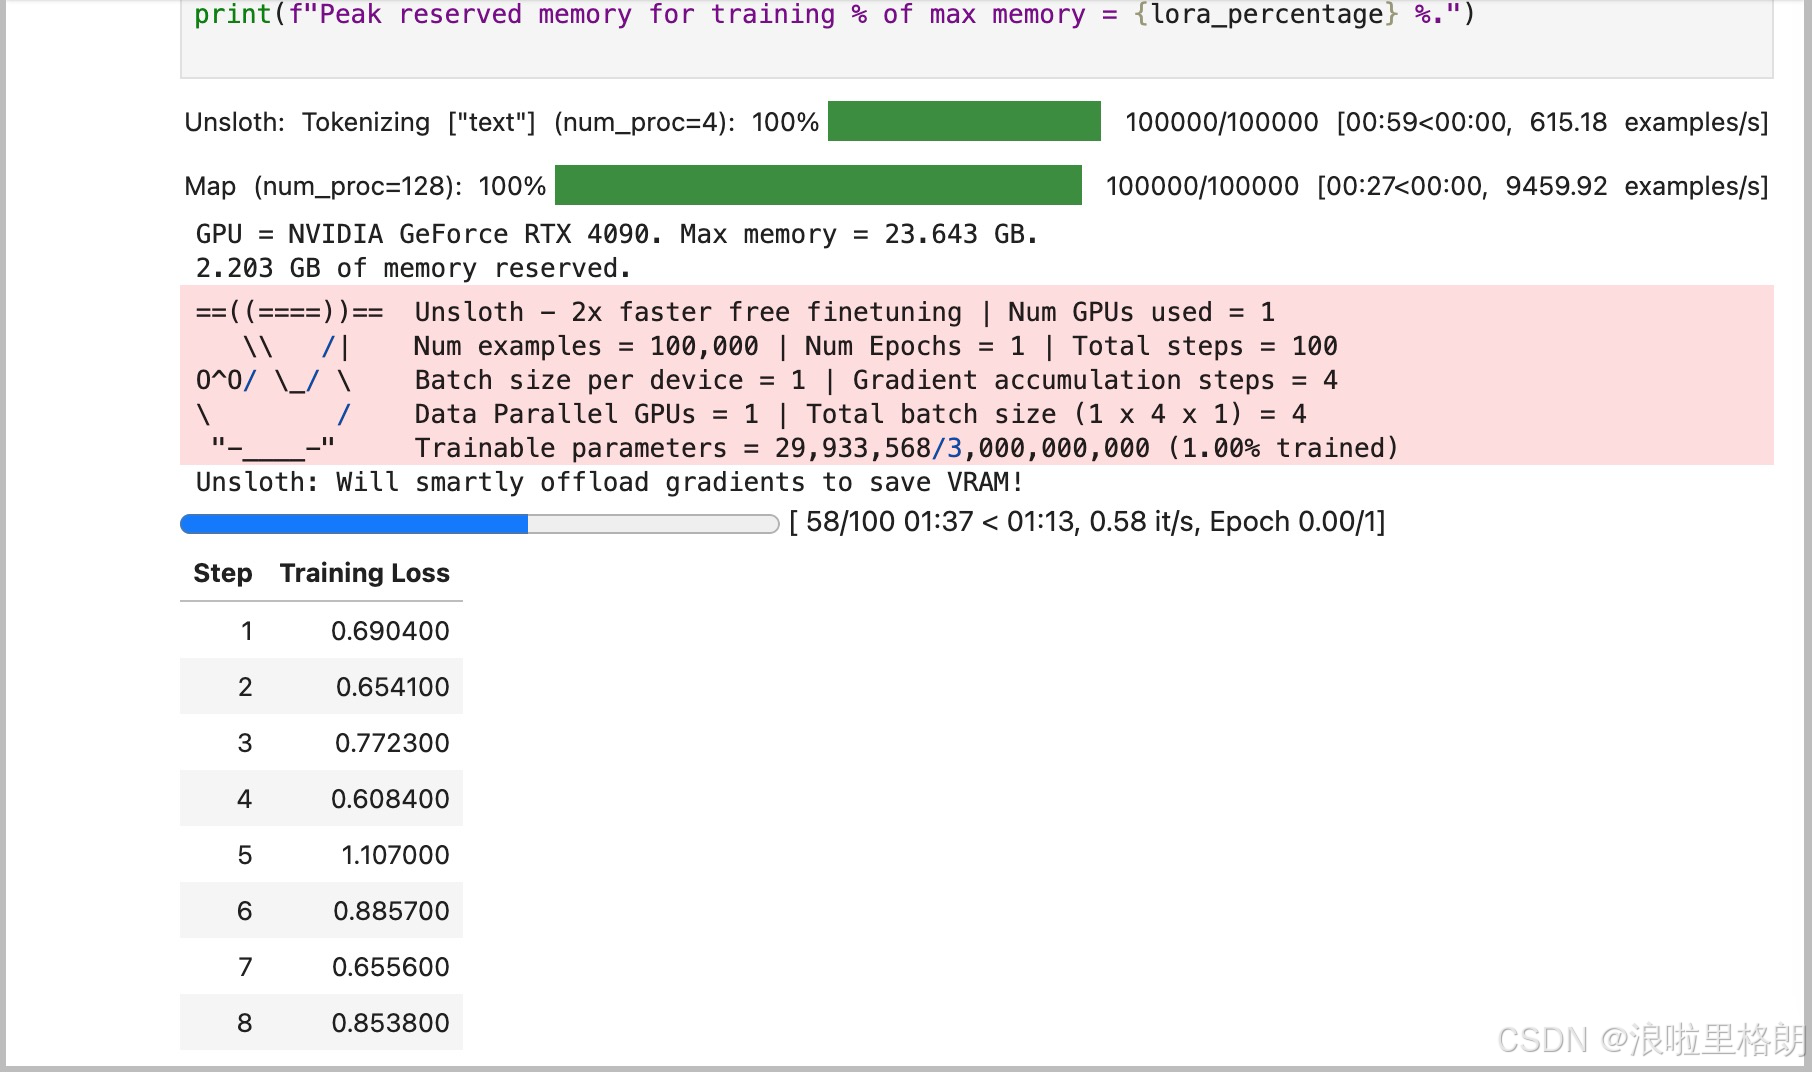
# 获取GPU信息
gpu_stats = torch.cuda.get_device_properties(0)
start_gpu_memory = round(torch.cuda.max_memory_reserved() / 1024 / 1024 / 1024, 3)
max_memory = round(gpu_stats.total_memory / 1024 / 1024 / 1024, 3)
print(f"GPU = {gpu_stats.name}. Max memory = {max_memory} GB.")
print(f"{start_gpu_memory} GB of memory reserved.")
trainer_stats = trainer.train()
# 显示训练统计信息
used_memory = round(torch.cuda.max_memory_reserved() / 1024 / 1024 / 1024, 3)
used_memory_for_lora = round(used_memory - start_gpu_memory, 3)
used_percentage = round(used_memory / max_memory * 100, 3)
lora_percentage = round(used_memory_for_lora / max_memory * 100, 3)
print(f"{trainer_stats.metrics['train_runtime']} seconds used for training.")
print(f"{round(trainer_stats.metrics['train_runtime']/60, 2)} minutes used for training.")
print(f"Peak reserved memory = {used_memory} GB.")
print(f"Peak reserved memory for training = {used_memory_for_lora} GB.")
print(f"Peak reserved memory % of max memory = {used_percentage} %.")
print(f"Peak reserved memory for training % of max memory = {lora_percentage} %.")
这段代码主要是使用trl库中的SFTTrainer对模型进行监督微调(Supervised Fine-Tuning,SFT),并记录训练过程中的 GPU 内存使用情况和训练统计信息。
5. 模型保存
save_path = './outputs/01_outputs/lora_model'

# 本地保存模型和分词器
model.save_pretrained(save_path)  # 保存模型权重
tokenizer.save_pretrained(save_path)  # 保存分词器
# 在线保存到HuggingFace Hub
# model.push_to_hub("your_name/lora_model", token = "...") # 上传模型到Hub
# tokenizer.push_to_hub("your_name/lora_model", token = "...") # 上传分词器到Hub

if False:
    from unsloth import FastLanguageModel
    # 加载预训练模型
    model, tokenizer = FastLanguageModel.from_pretrained(
        model_name = save_path,  # 模型路径
        max_seq_length = max_seq_length,  # 最大序列长度
        dtype = dtype,  # 数据类型
        load_in_4bit = load_in_4bit,  # 是否4bit加载
    )
    FastLanguageModel.for_inference(model)  # 开启推理模式

    # 测试用例
    messages = [
        {"role": "user", "content": """Here is a programming problem for testing:

        **Matrix Chain Multiplication Optimization**

        ### Problem:
        Given a chain of matrices `A1, A2, ..., An`, where the dimensions of Ai are `P[i-1] x P[i]`,
        find the optimal parenthesization order that minimizes the total scalar multiplication cost.

        **Input:**
        1. An array `P` representing dimensions, e.g., P = [10, 20, 30, 40].

        **Output:**
        1. The optimal parenthesization order (e.g., `(A1 x (A2 x A3))`).
        2. The minimum scalar multiplication cost.
        3. A comparison to the naive left-to-right multiplication cost.

        ### Constraints:
        - Use dynamic programming to solve this problem efficiently.
        - Provide a solution for P of length up to 10^5 (optional for advanced testing).

        ### Example:
        Input: P = [10, 20, 30]
        Output:
        - Optimal order: `(A1 x A2)`
        - Minimum cost: 6000
        - Naive cost: 6000

        Input: P = [10, 20, 30, 40]
        Output:
        - Optimal order: `((A1 x A2) x A3)`
        - Minimum cost: 18000
        - Naive cost: 24000

        Implement the solution and evaluate it against these criteria."""}
    ]
    # 准备输入数据
    inputs = tokenizer.apply_chat_template(
        messages,  # 消息列表
        tokenize = True,  # 是否分词
        add_generation_prompt = True,  # 添加生成提示
        return_tensors = "pt",  # 返回PyTorch张量
    ).to("cuda")  # 移至GPU

    # 文本生成
    from transformers import TextStreamer
    text_streamer = TextStreamer(tokenizer, skip_prompt = True)  # 创建文本流
    _ = model.generate(input_ids = inputs, streamer = text_streamer, max_new_tokens = 128,
                       use_cache = True, temperature = 1.5, min_p = 0.1)  # 生成文本

if False:
    # 使用标准Hugging Face接口加载
    from peft import AutoPeftModelForCausalLM
    from transformers import AutoTokenizer

    model = AutoPeftModelForCausalLM.from_pretrained(
        save_path,  # 模型路径
        load_in_4bit=load_in_4bit,  # 4bit加载
    )
    tokenizer = AutoTokenizer.from_pretrained(save_path)  # 加载分词器

# 保存为16bit格式
if False: model.save_pretrained_merged("model", tokenizer, save_method = "merged_16bit",)  # 本地保存
6.模型推理
6.1 使用监督微调的 LoRA 进行推理
import torch
import warnings
from peft import PeftModel
from transformers import GenerationConfig
# 禁用 peft 的 UserWarning(关键修改)
warnings.filterwarnings("ignore", category=UserWarning, module="peft")
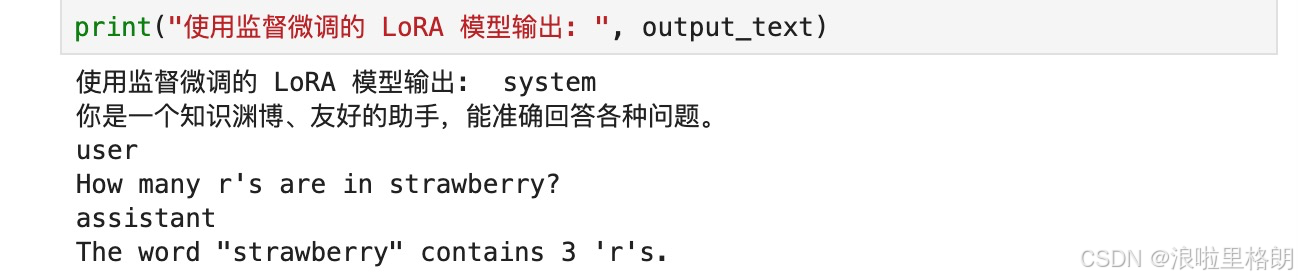
# 定义 SYSTEM_PROMPT
SYSTEM_PROMPT = "你是一个知识渊博、友好的助手,能准确回答各种问题。"
# 加载 LoRA 权重
model = PeftModel.from_pretrained(model, save_path)
# 应用聊天模板
text = tokenizer.apply_chat_template([
{"role": "system", "content": SYSTEM_PROMPT},
{"role": "user", "content": "How many r's are in strawberry?"}
], tokenize=False, add_generation_prompt=True)
# 配置生成参数
generation_config = GenerationConfig(
temperature=0.8,
top_p=0.95,
max_new_tokens=1024,
)
# 将文本转换为输入张量
input_ids = tokenizer(text, return_tensors="pt").input_ids.to(model.device)
# 使用标准的 generate 方法生成输出
with torch.no_grad():
output = model.generate(
input_ids=input_ids,
generation_config=generation_config
)
# 解码输出
output_text = tokenizer.decode(output[0], skip_special_tokens=True)
print("使用监督微调的 LoRA 模型输出: ", output_text)
6.2 配置推理用的分词器
# 配置推理用的分词器
tokenizer = get_chat_template(
    tokenizer,
    chat_template = "qwen-2.5",
)
FastLanguageModel.for_inference(model)   # 推理模式(仅需一次)
- get_chat_template 函数:此函数用于对分词器进行配置,使其适配特定的聊天模板(这里是 qwen - 2.5),从而能正确处理输入的对话式文本。
- FastLanguageModel.for_inference(model):该方法将模型设置为推理模式,让模型做好进行推理的准备。
6.3 准备输入
# 准备测试输入
messages = [
    {"role": "user", "content": """Here is a programming problem for testing:

    **Matrix Chain Multiplication Optimization**

    ### Problem:
    Given a chain of matrices `A1, A2, ..., An`, where the dimensions of Ai are `P[i-1] x P[i]`,
    find the optimal parenthesization order that minimizes the total scalar multiplication cost.

    **Input:**
    1. An array `P` representing dimensions, e.g., P = [10, 20, 30, 40].

    **Output:**
    1. The optimal parenthesization order (e.g., `(A1 x (A2 x A3))`).
    2. The minimum scalar multiplication cost.
    3. A comparison to the naive left-to-right multiplication cost.

    ### Constraints:
    - Use dynamic programming to solve this problem efficiently.
    - Provide a solution for P of length up to 10^5 (optional for advanced testing).

    ### Example:
    Input: P = [10, 20, 30]
    Output:
    - Optimal order: `(A1 x A2)`
    - Minimum cost: 6000
    - Naive cost: 6000

    Input: P = [10, 20, 30, 40]
    Output:
    - Optimal order: `((A1 x A2) x A3)`
    - Minimum cost: 18000
    - Naive cost: 24000

    Implement the solution and evaluate it against these criteria."""}
]
inputs = tokenizer.apply_chat_template(
    messages,
    tokenize = True,
    add_generation_prompt = True,
    return_tensors = "pt",
).to("cuda")
- messages:这是一个包含用户输入的列表,其中每个元素是一个字典,字典的 role 键指定角色(这里是 user),content 键包含具体的输入内容,即一个矩阵链乘法优化的编程问题。
- tokenizer.apply_chat_template:该方法按照之前配置的聊天模板对输入消息进行处理,将其转换为模型能够接受的输入格式。具体参数解释如下:
- tokenize = True:表示对输入进行分词处理。
- add_generation_prompt = True:在输入中添加生成提示,以引导模型生成合适的输出。
- return_tensors = “pt”:返回 PyTorch 张量格式的输入。
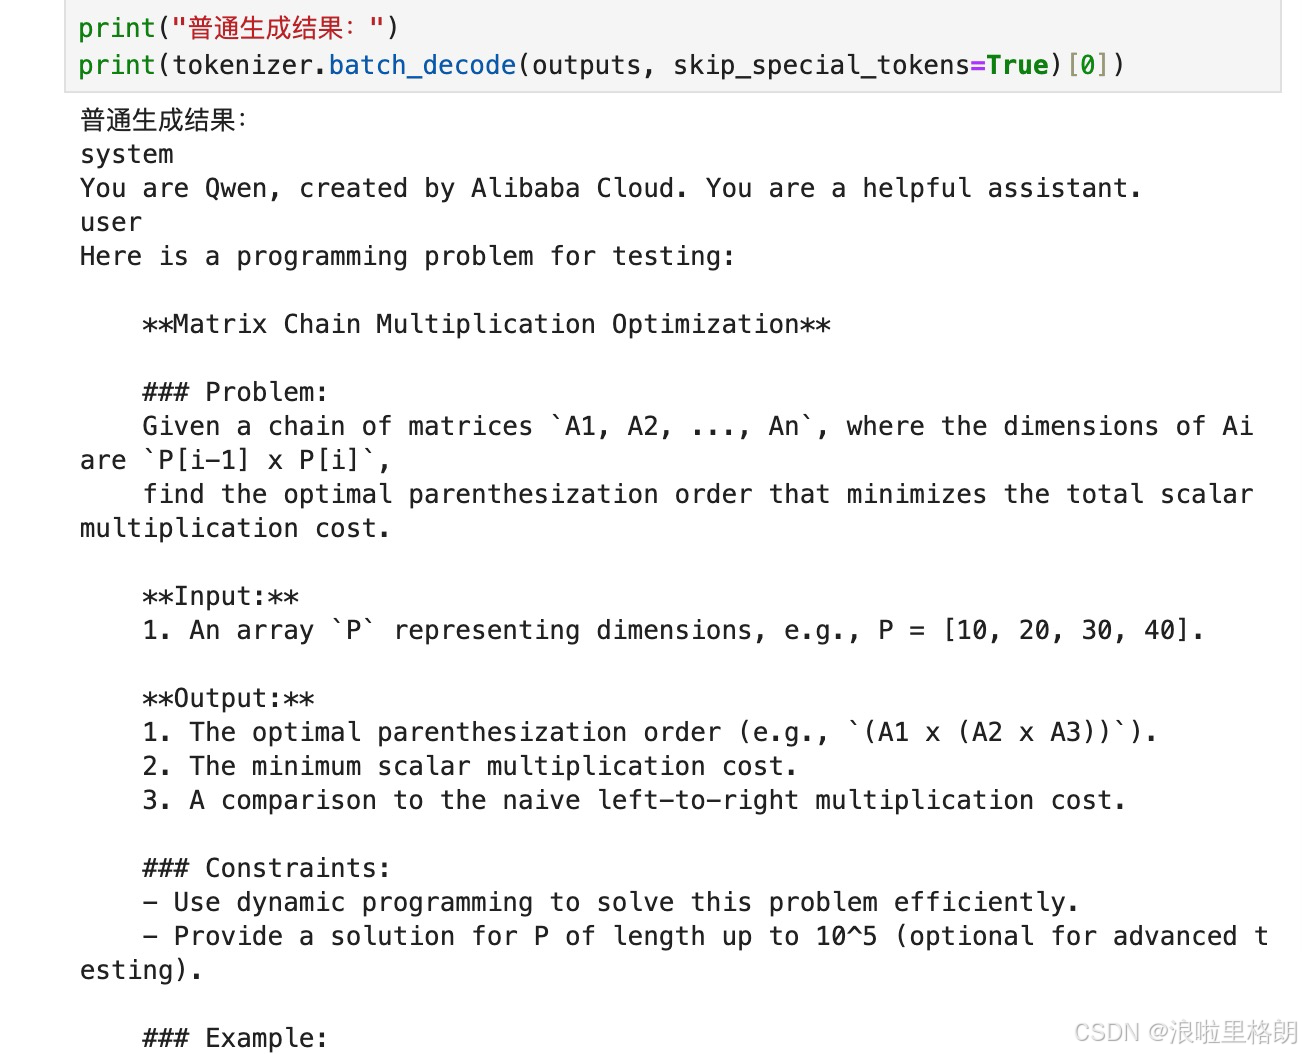
6.3 普通生成输出
普通生成:
# 普通生成(删除冗余的 FastLanguageModel.for_inference)
outputs = model.generate(
    input_ids=inputs,
    max_new_tokens=64,
    use_cache=True,
    temperature=1.5,
    min_p=0.1
)

print("普通生成结果:")
print(tokenizer.batch_decode(outputs, skip_special_tokens=True))
- model.generate:这是模型的生成方法,用于根据输入生成输出。具体参数解释如下:
- input_ids = inputs:指定输入的张量。
- max_new_tokens = 64:限制模型最多生成 64 个新的标记。
- use_cache = True:启用缓存机制,以提高生成效率。
- temperature = 1.5:控制生成的随机性,值越大,生成结果越随机。
- min_p = 0.1:这是一个概率阈值,用于控制采样过程。
- tokenizer.batch_decode(outputs):将模型生成的标记序列解码为文本字符串。
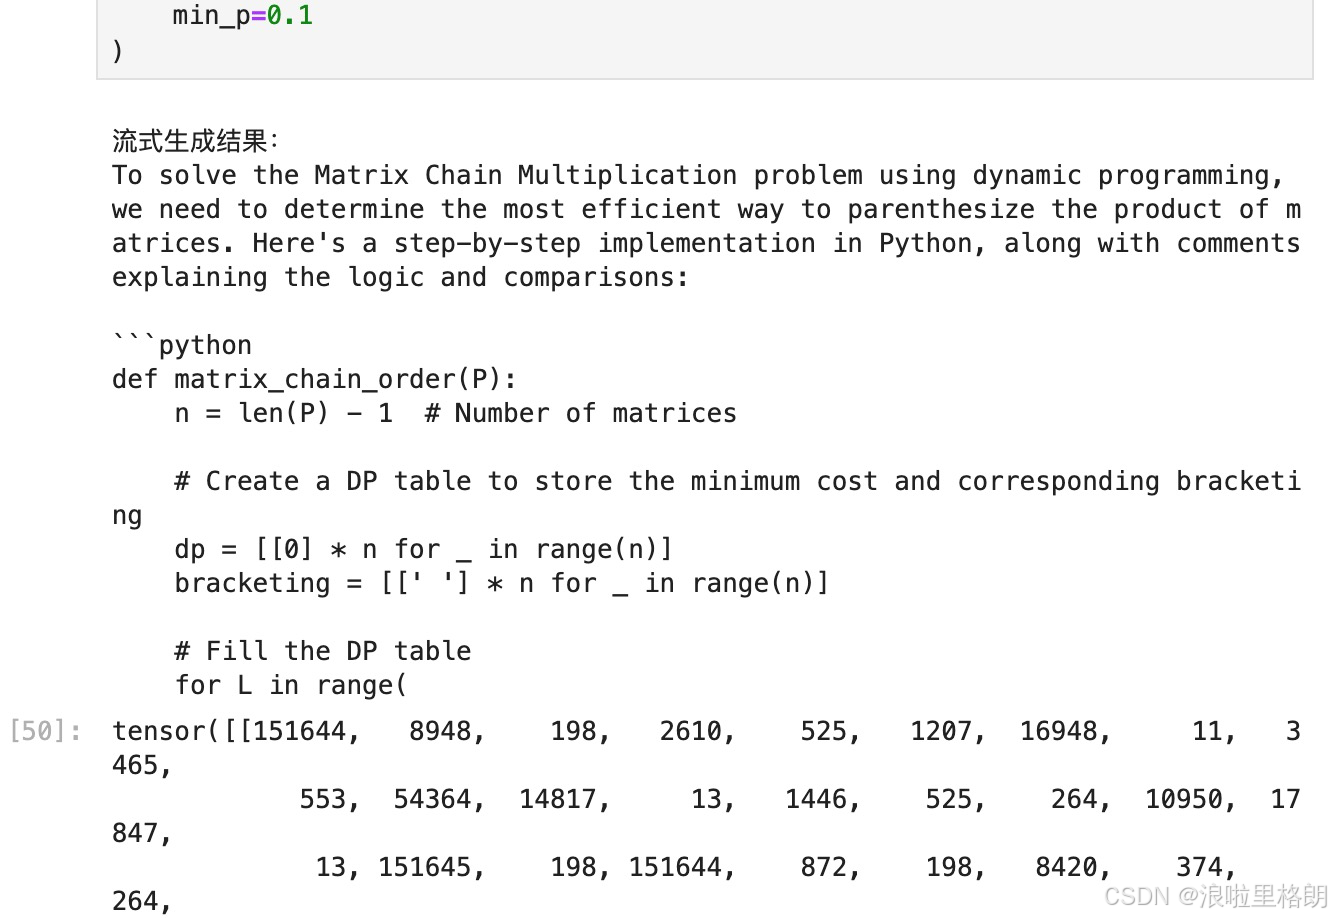
6.4 流式生成输出
使用 TextStreamer 进行流式生成:
# 流式生成(复用已准备的 inputs)
from transformers import TextStreamer

print("\n流式生成结果:")
text_streamer = TextStreamer(tokenizer, skip_prompt=True)  # 跳过输入提示

model.generate(
    input_ids=inputs,
    streamer=text_streamer,
    max_new_tokens=128,
    use_cache=True,
    temperature=1.5,
    min_p=0.1
)
- TextStreamer:这是 transformers 库中的一个类,用于实现流式生成。它可以在模型生成标记的同时,实时将解码后的文本输出,而不是等整个生成过程结束后再输出。
- text_streamer = TextStreamer(tokenizer, skip_prompt = True):创建一个 TextStreamer 对象,skip_prompt = True 表示跳过输入提示部分的输出。
- model.generate:再次调用模型的生成方法,这次传入 streamer = text_streamer 参数,让模型在生成过程中通过 TextStreamer 实时输出结果。max_new_tokens = 128 表示最多生成 128 个新标记。
引用
[1]. https://github.com/LFF8888/FF-Studio-Resources
[2]. https://www.autodl.com/docs/
[3]. https://huggingface.co/unsloth/Qwen2.5-Coder-3B-Instruct

欢迎加入 MCP 技术社区!与志同道合者携手前行,一同解锁 MCP 技术的无限可能!
更多推荐

 31
31 0
0- 0


 已为社区贡献4条内容

所有评论(0)