【BurpSuite 新版本插件开发】基础篇3:请求拦截和修改简单示例
·
1 前言
历史章节:
【BurpSuite 新版本插件开发】基础篇2:插件生命周期与核心接口
在前两篇教程中,我们已经完成了开发环境的搭建,了解了插件的生命周期以及核心接口。接下来,将结合 BurpSuite 社区版的功能,带大家进行实际操作,开发一个简单的插件,让大家对 BurpSuite 插件开发有更直观的认识。
代码结构: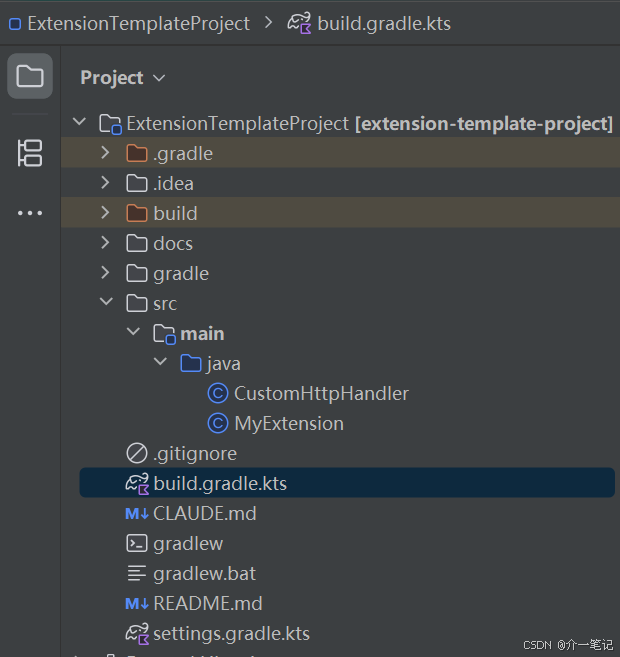
2 HTTP 请求拦截与修改
BurpSuite 代理模块(Proxy)和 HTTP模块均能够拦截 HTTP/HTTPS 请求,在安全测试中特别常用;我们这里通过 HTTP 模块的使用,实现对请求的修改:为所有请求添加自定义请求头。
2.1 代码实现
- 实现
BurpExtension接口:表明该类是一个 Burp Suite 扩展。 initialize方法:在扩展初始化时被调用,主要完成以下操作:- 设置扩展名称为
Custom HTTP Handler Extension。 - 注册
CustomHttpHandler作为 HTTP 请求处理器,用于拦截和处理 HTTP 请求。
- 设置扩展名称为
import burp.api.montoya.BurpExtension;
import burp.api.montoya.MontoyaApi;

@SuppressWarnings("unused")
public class MyExtension implements BurpExtension {
    @Override
    public void initialize(MontoyaApi montoyaApi) {

        // 设置扩展名称
        montoyaApi.extension().setName("Custom HTTP Handler Extension");

        // 注册自定义 HTTP 请求处理器
        montoyaApi.http().registerHttpHandler(new CustomHttpHandler(montoyaApi));

    }
}
-
实现
HttpHandler接口:表明该类是一个 HTTP 请求处理器,用于处理 HTTP 请求和响应。 -
构造函数:接收
MontoyaApi实例,用于后续操作。 -
handleHttpRequestToBeSent 方法:在 HTTP 请求发送前被调用,主要完成以下操作:
- 尝试为请求添加自定义请求头 X-Custom-Header: BurpPlugin。
- 打印原始请求和修改后请求的信息到 Burp Suite 的输出日志。
- 若出现异常,打印错误日志并继续使用原始请求发送。
-
handleHttpResponseReceived 方法 :
- 在接收到 HTTP 响应后被调用
- 打印响应的头部信息到 Burp Suite 的输出日志,并继续处理响应。
import burp.api.montoya.MontoyaApi;
import burp.api.montoya.http.handler.*;
import burp.api.montoya.http.message.requests.HttpRequest;

public class CustomHttpHandler implements HttpHandler {
    private final MontoyaApi montoyaApi;

    public CustomHttpHandler(MontoyaApi montoyaApi) {
        this.montoyaApi = montoyaApi;
    }

    @Override
    public RequestToBeSentAction handleHttpRequestToBeSent(HttpRequestToBeSent requestToBeSent) {
        try {
            // 添加自定义头到请求
            HttpRequest modifiedRequest = requestToBeSent.withAddedHeader("X-Custom-Header", "BurpPlugin");

            // 打印修改后请求信息
            montoyaApi.logging().logToOutput("=== Modified Request ===");
            montoyaApi.logging().logToOutput("URL: " + modifiedRequest.url());
            montoyaApi.logging().logToOutput("Headers: " + modifiedRequest.headers());

            // 返回包含修改后请求的动作
            return RequestToBeSentAction.continueWith(modifiedRequest);
        } catch (Exception e) {
            montoyaApi.logging().logToError("Error handling request: " + e.getMessage());
            return RequestToBeSentAction.continueWith(requestToBeSent);
        }
    }

    @Override
    public ResponseReceivedAction handleHttpResponseReceived(HttpResponseReceived responseReceived) {
        // 打印响应相关信息
        montoyaApi.logging().logToOutput("=== Received Response ===");
        montoyaApi.logging().logToOutput("Response Headers: " + responseReceived.headers());
        return ResponseReceivedAction.continueWith(responseReceived);
    }
}
2.2 插件部署与验证
使用 Gradle 打包插件: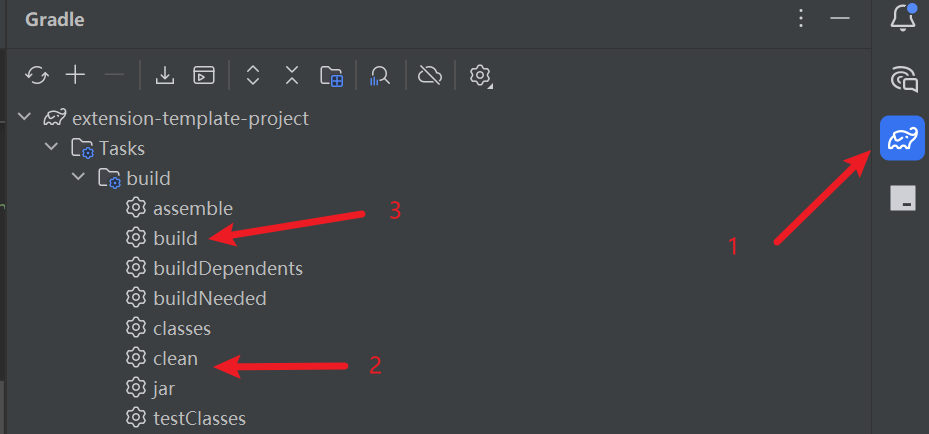
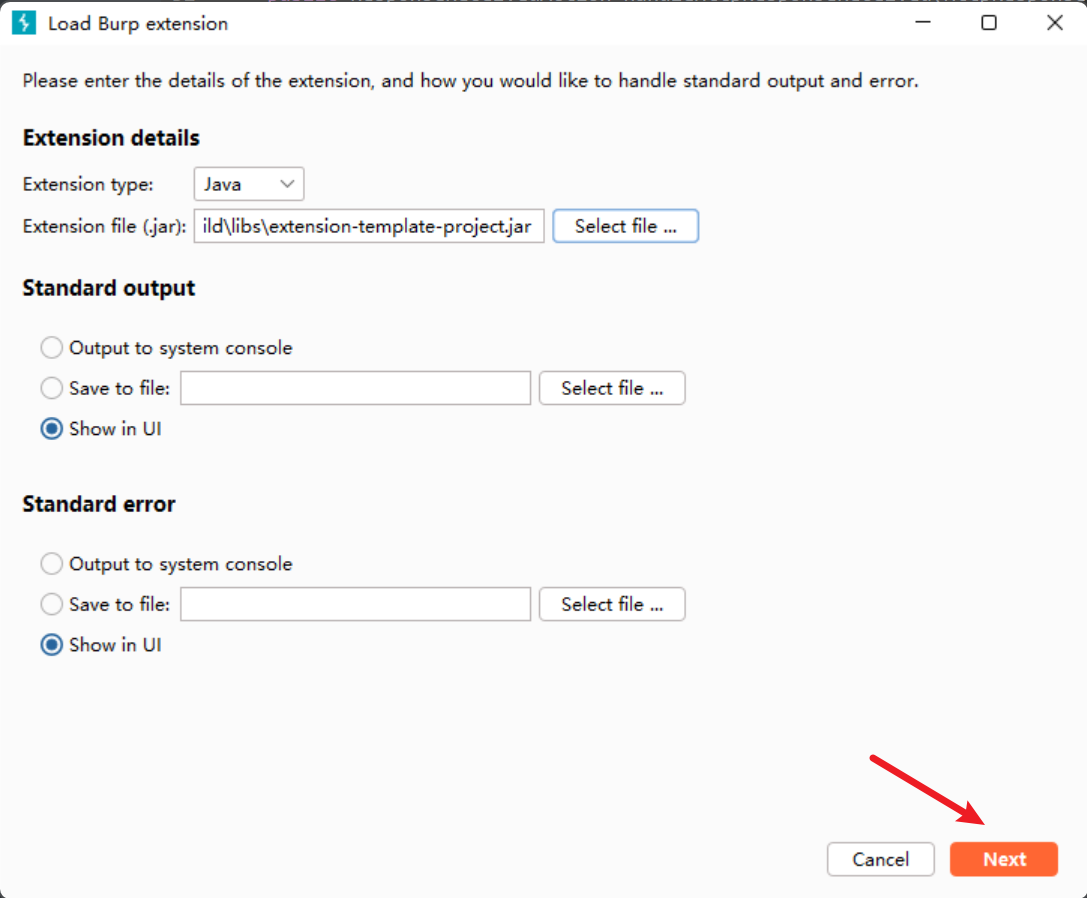
加载插件: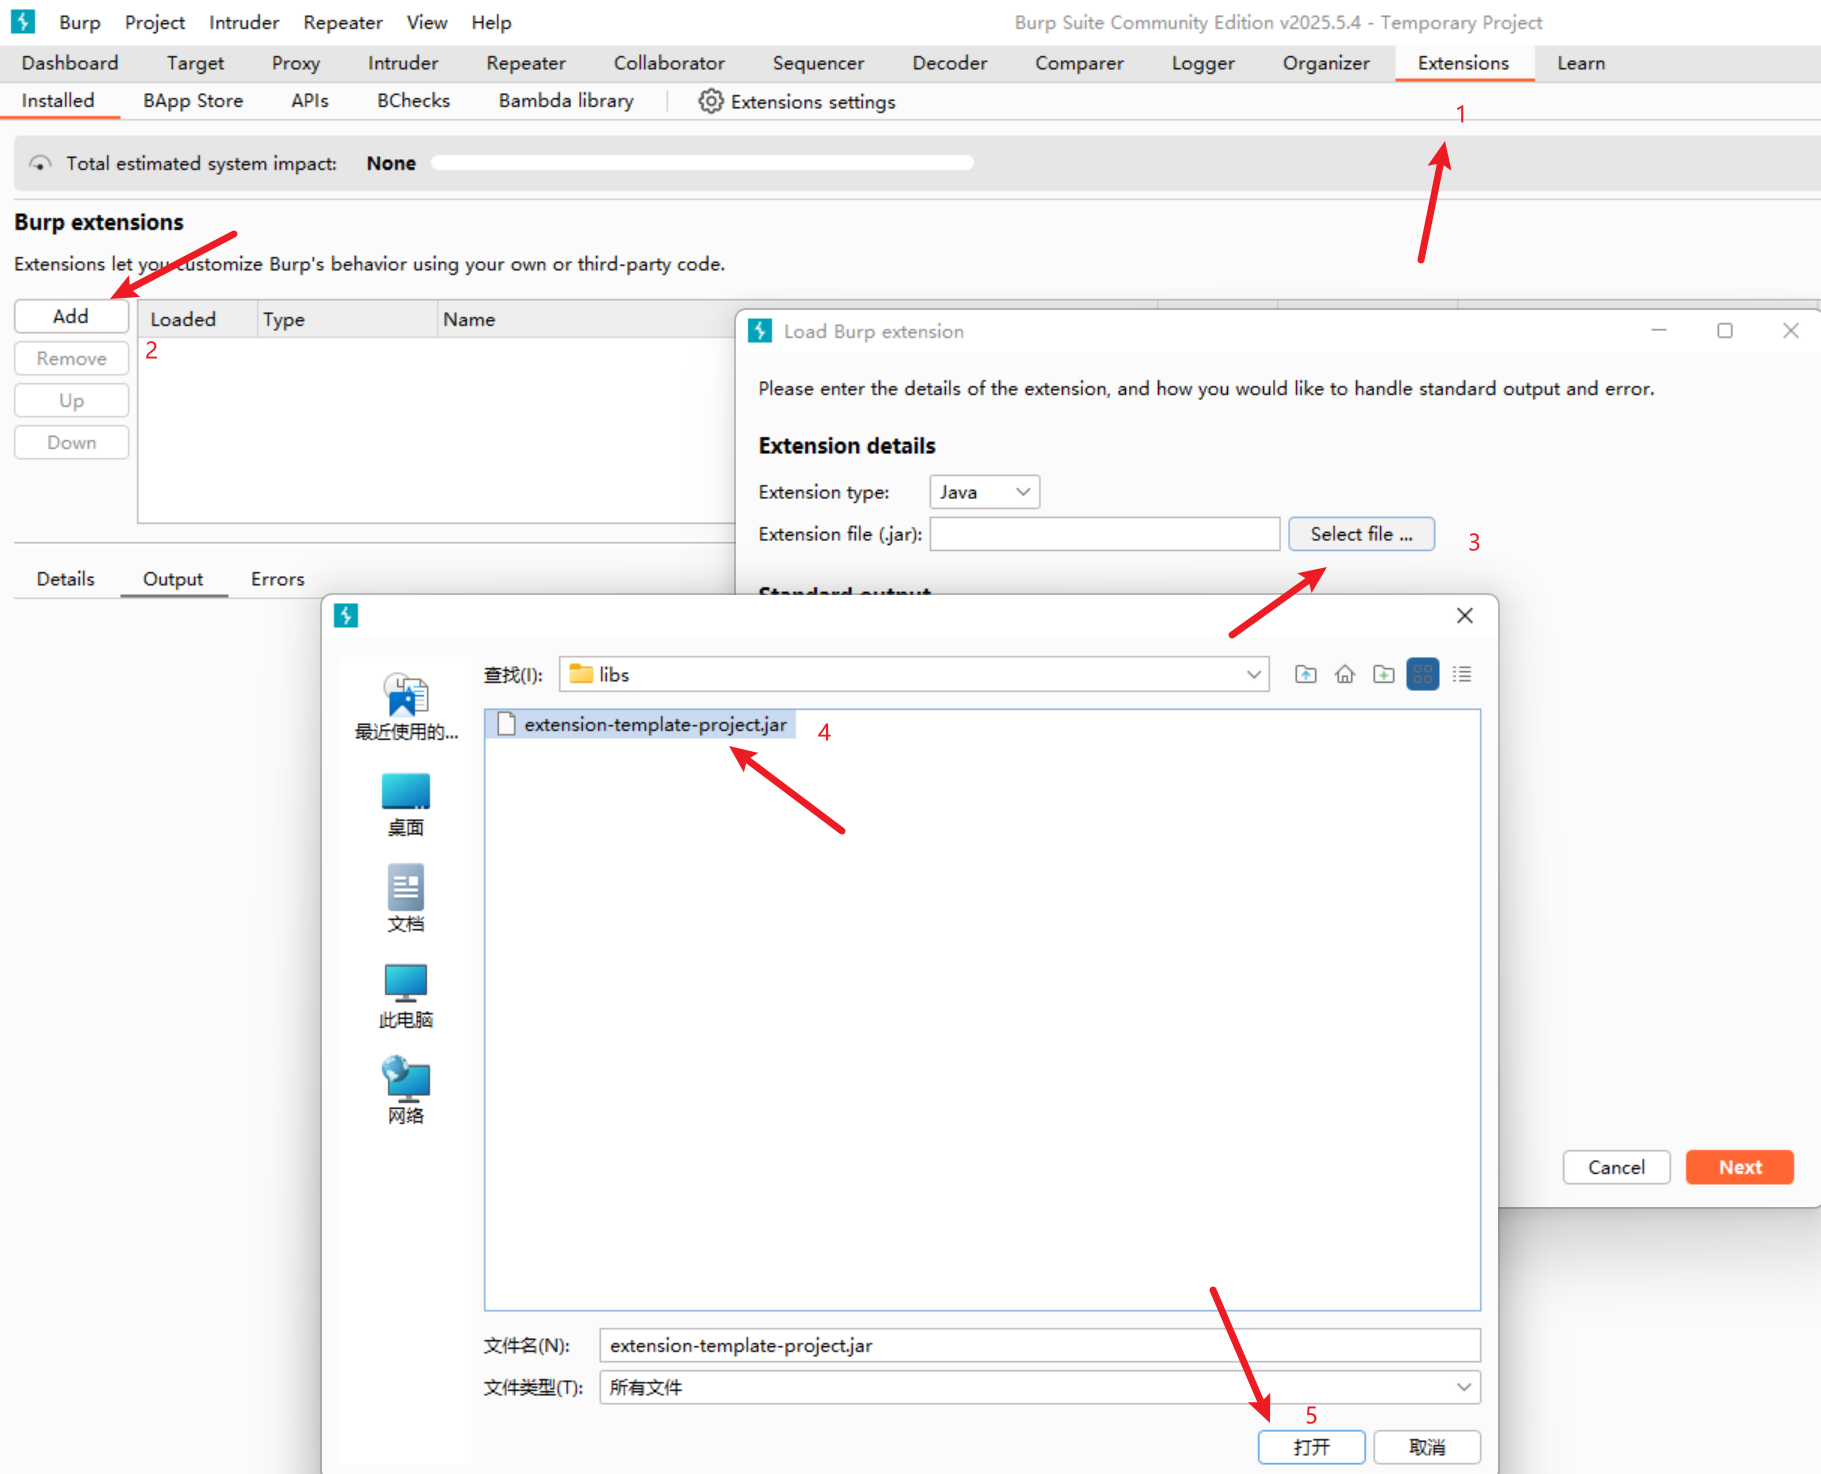
2.3 验证效果
在 Burpsuite 中,关闭拦截器。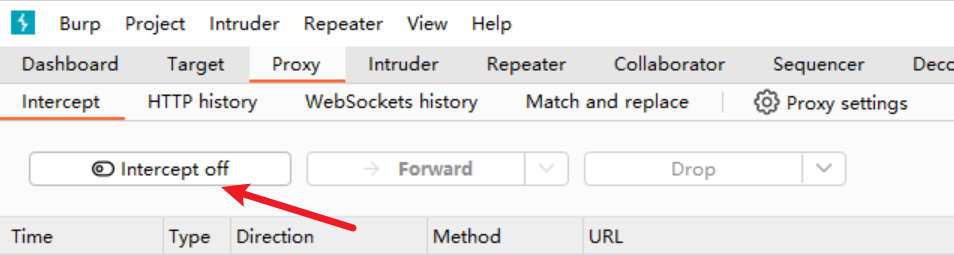
抓包一个请求,查看插件日志:请求被正确修改,并且正常发送被响应。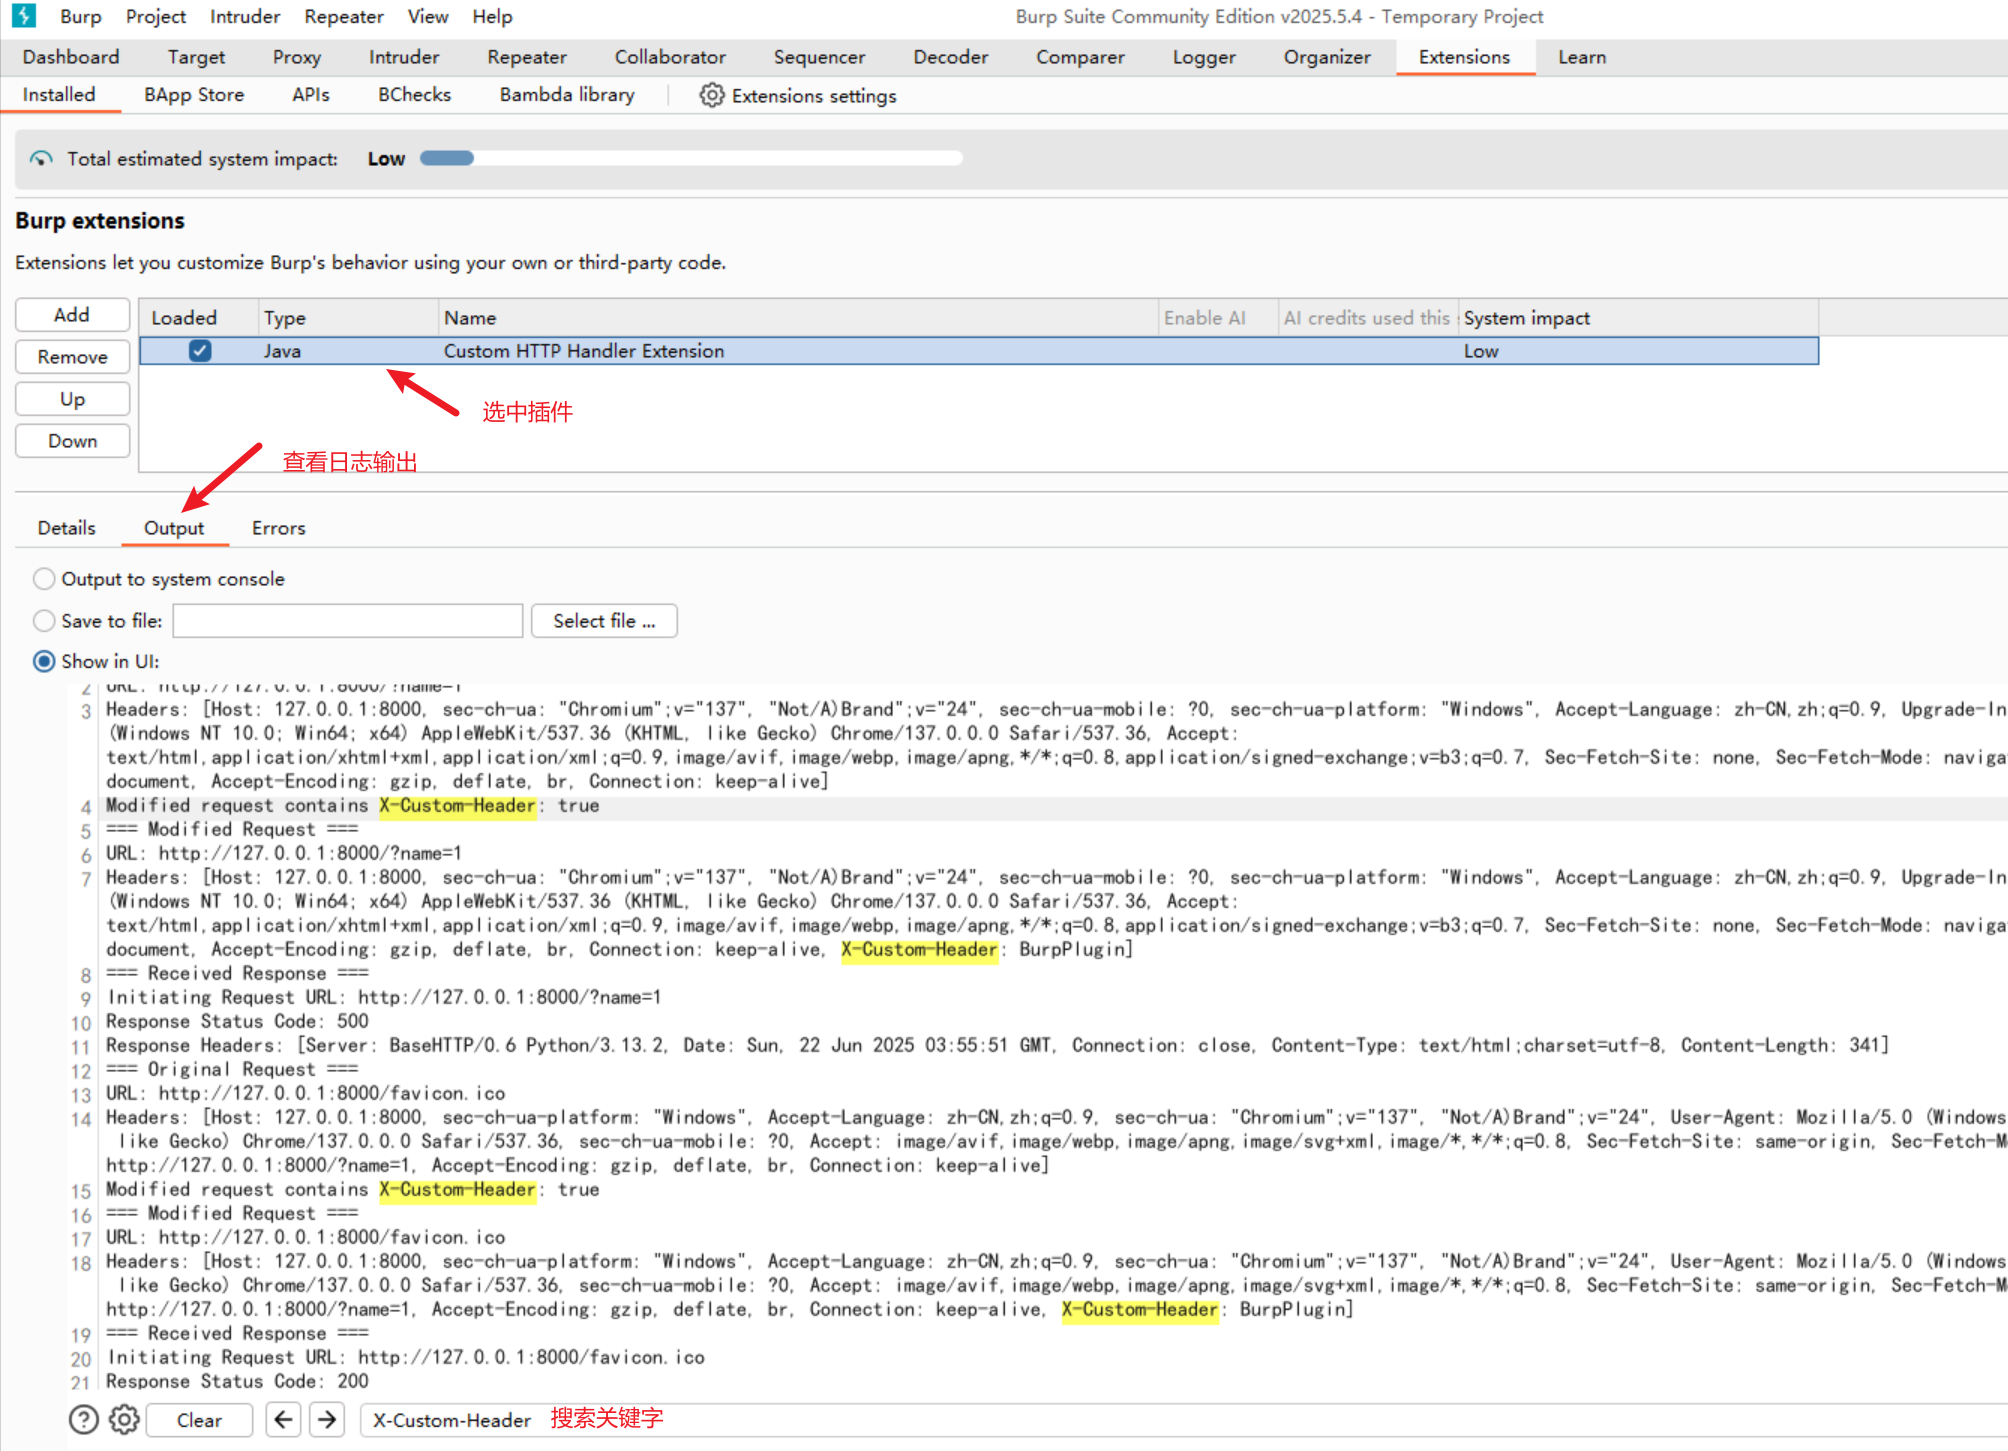
3 总结
本示例通过 Montoya API 实现了 BurpSuite 插件的基础 HTTP 请求拦截功能,核心流程为:
- 注册HttpHandler处理器
- 在请求发送前修改请求头
- 通过日志验证修改效果
该示例是 Burp 插件开发的基础场景,进一步可扩展为漏洞扫描器、请求篡改工具等复杂功能。

欢迎加入 MCP 技术社区!与志同道合者携手前行,一同解锁 MCP 技术的无限可能!
更多推荐

 38
38 0
0- 0


 已为社区贡献4条内容

所有评论(0)